TOC
Why Update?
In the last blog post we looked at the unboxing and first set-up of the Azure Percept system and got our very first AI model running. However out of the box my Percept showed that it was running an old version of the OS Software so this blog will explain how you can check your device and then if needed set-up Digital Twins and automate the updating of your Azure Percept system(s).
The idea behind using the IOTHub and Device Twins is so that we can automate the updates and carry them out remotely from the device, after all the Percept is designed to be an Edge device so you don’t want to have to schlep to the outer edges of your system/installation to plug in a USB cable now do you? No we both know sitting at your warm comfy desk with a Cup«T>T> in hand is much nicer.
First Lets Check if your device needs an Update!
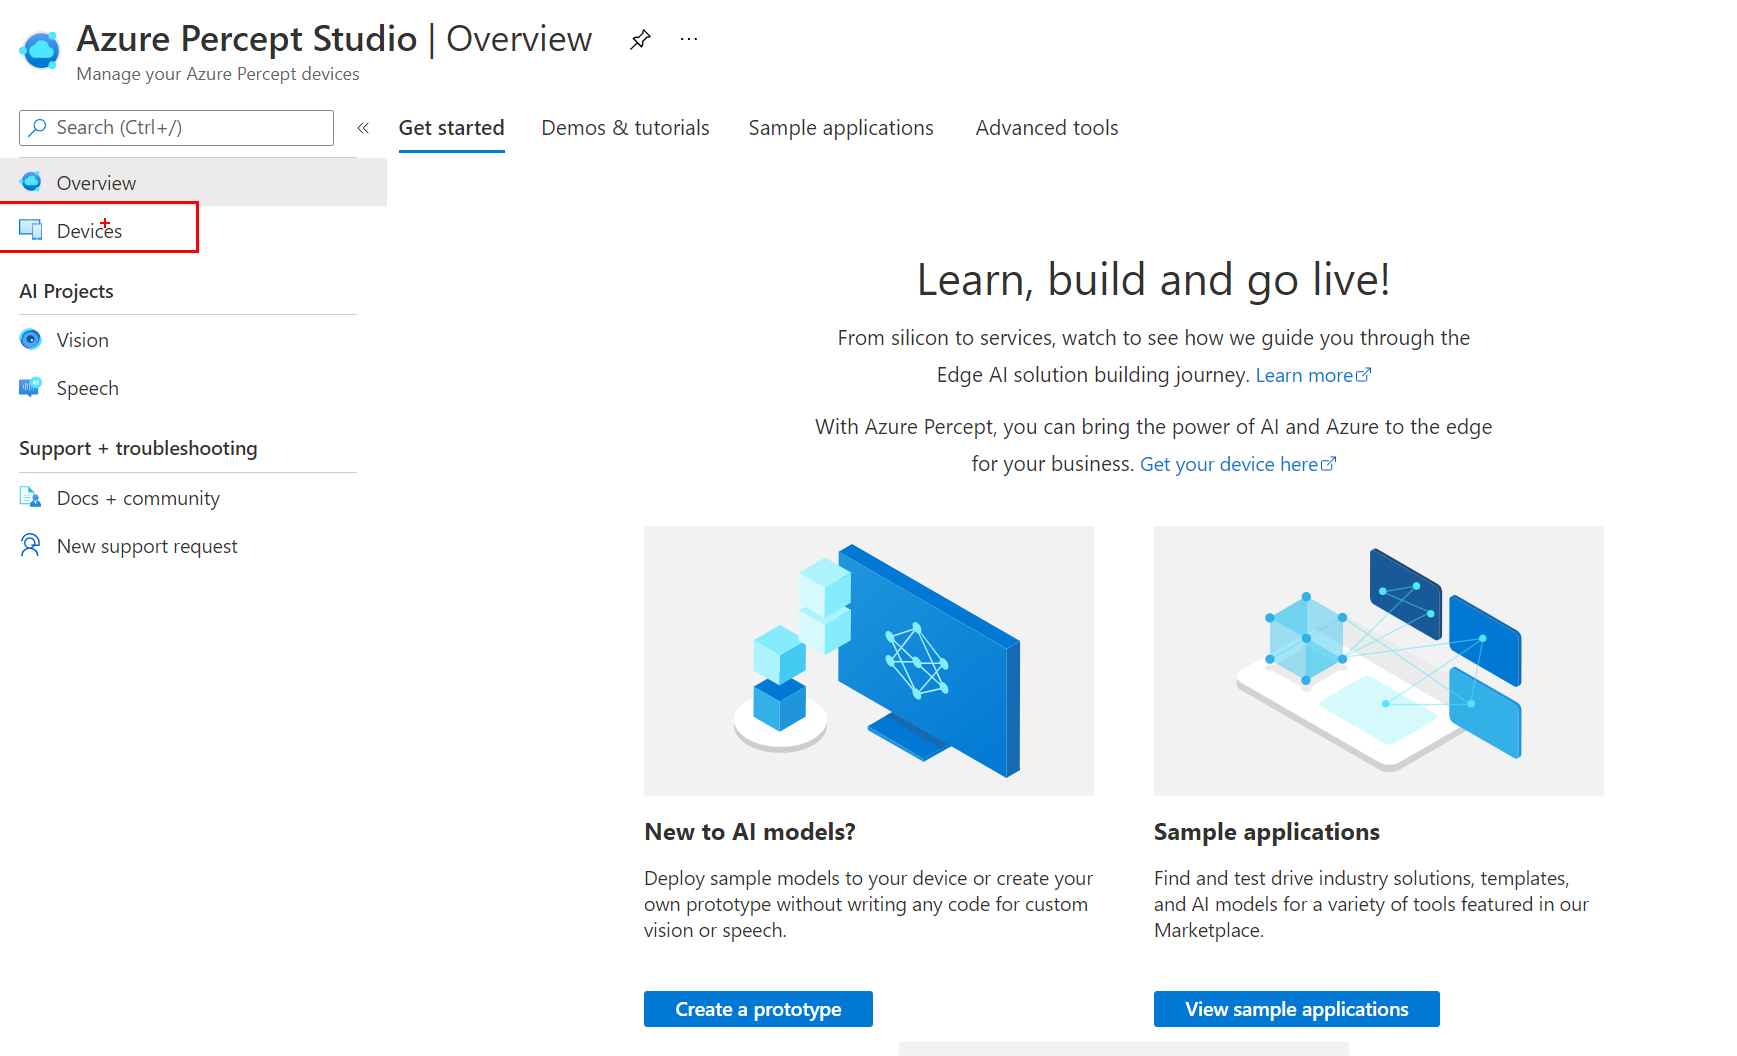
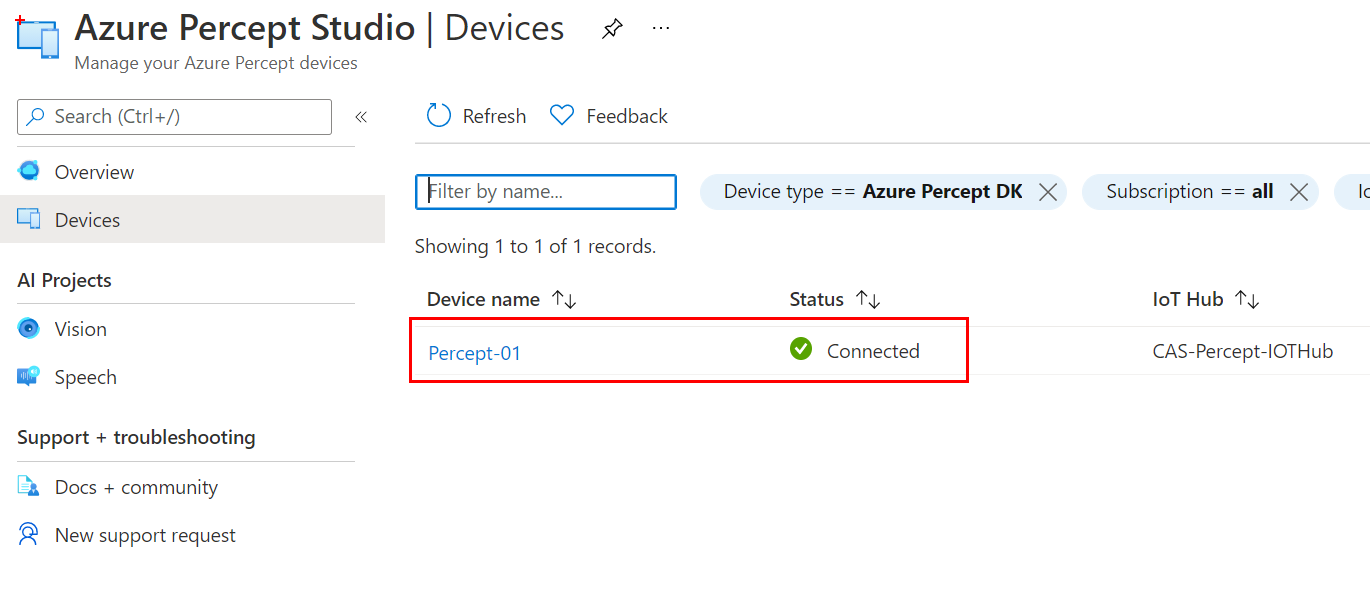
Open you Azure Percept Studio in the Azure Portal and select devices on the left pane and then select your Azure Percept Device.
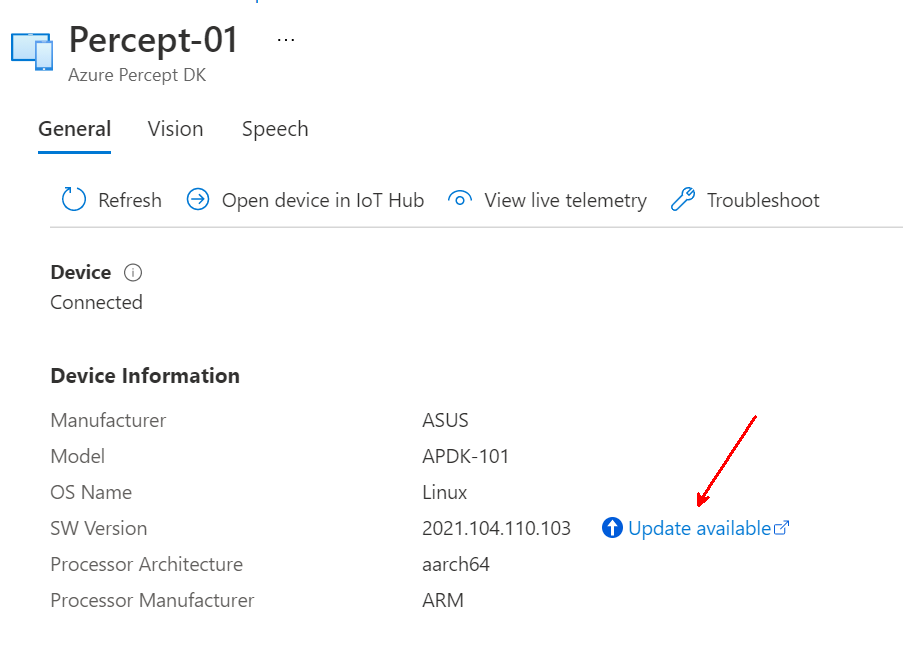
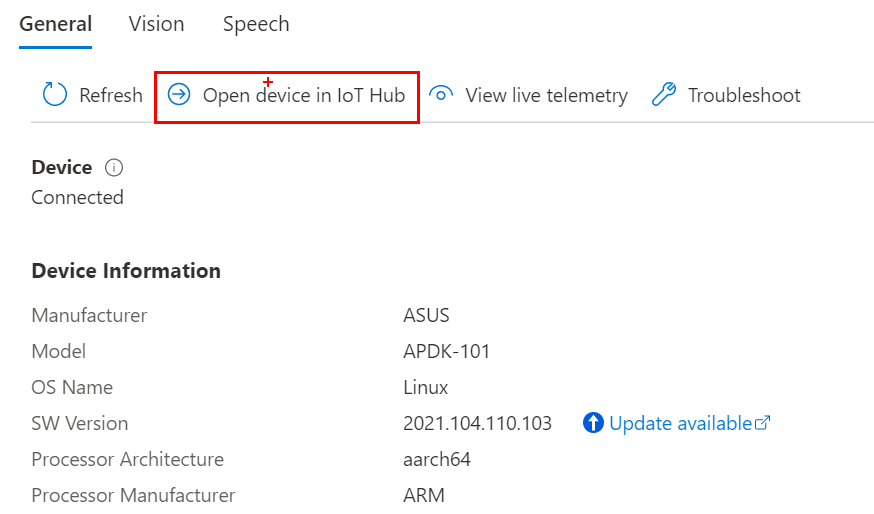
Now that you have your device selected you can check the SW Version and if you have the Updates Available icon and text next to it you can carry out an Update. Clicking the link will take you out to the Docs.Microsoft.com page that explains how to carry out an update.
Of course you can follow the docs or continue with this blog as I have screen shots. ;-) Also there are a few little Gotcha’s along the way and I point those out.
What version of the Update Do you Need?
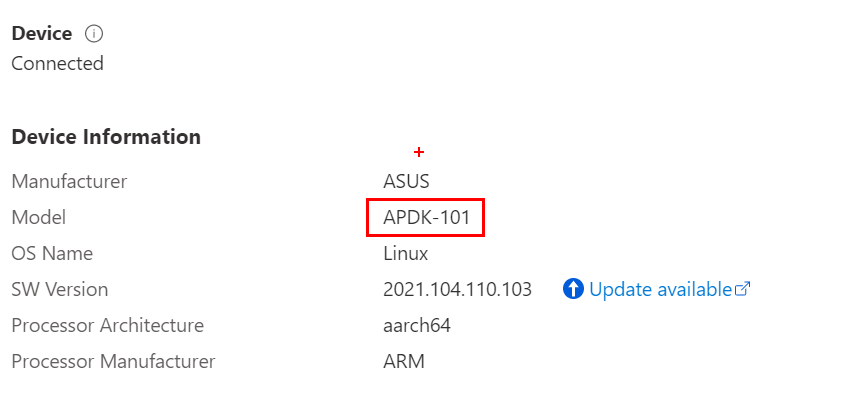
There are 2 ways to check this the easiest as you are already there is to look at the Model just above the Updates Available link so in my case APDK-101
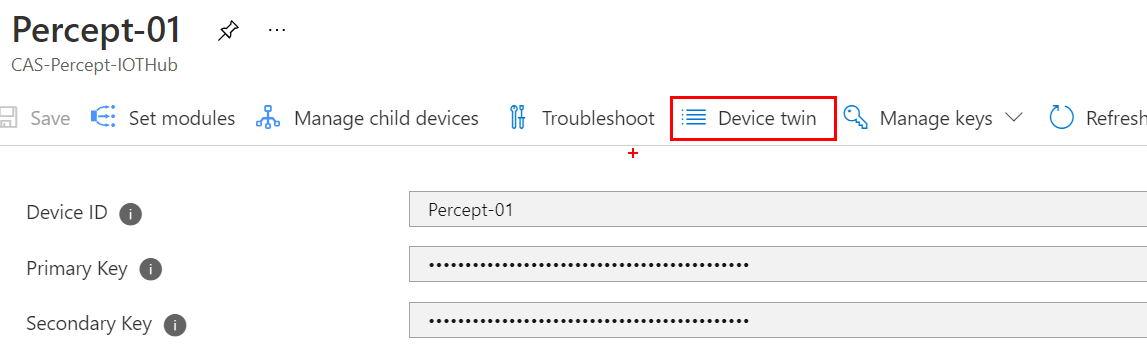
Or you can check in Device Twins which is nice as you can see all the details about your device that it is reporting back to IOT-Hub. To do this click the Open Device in IoT Hub at the top of the blade.
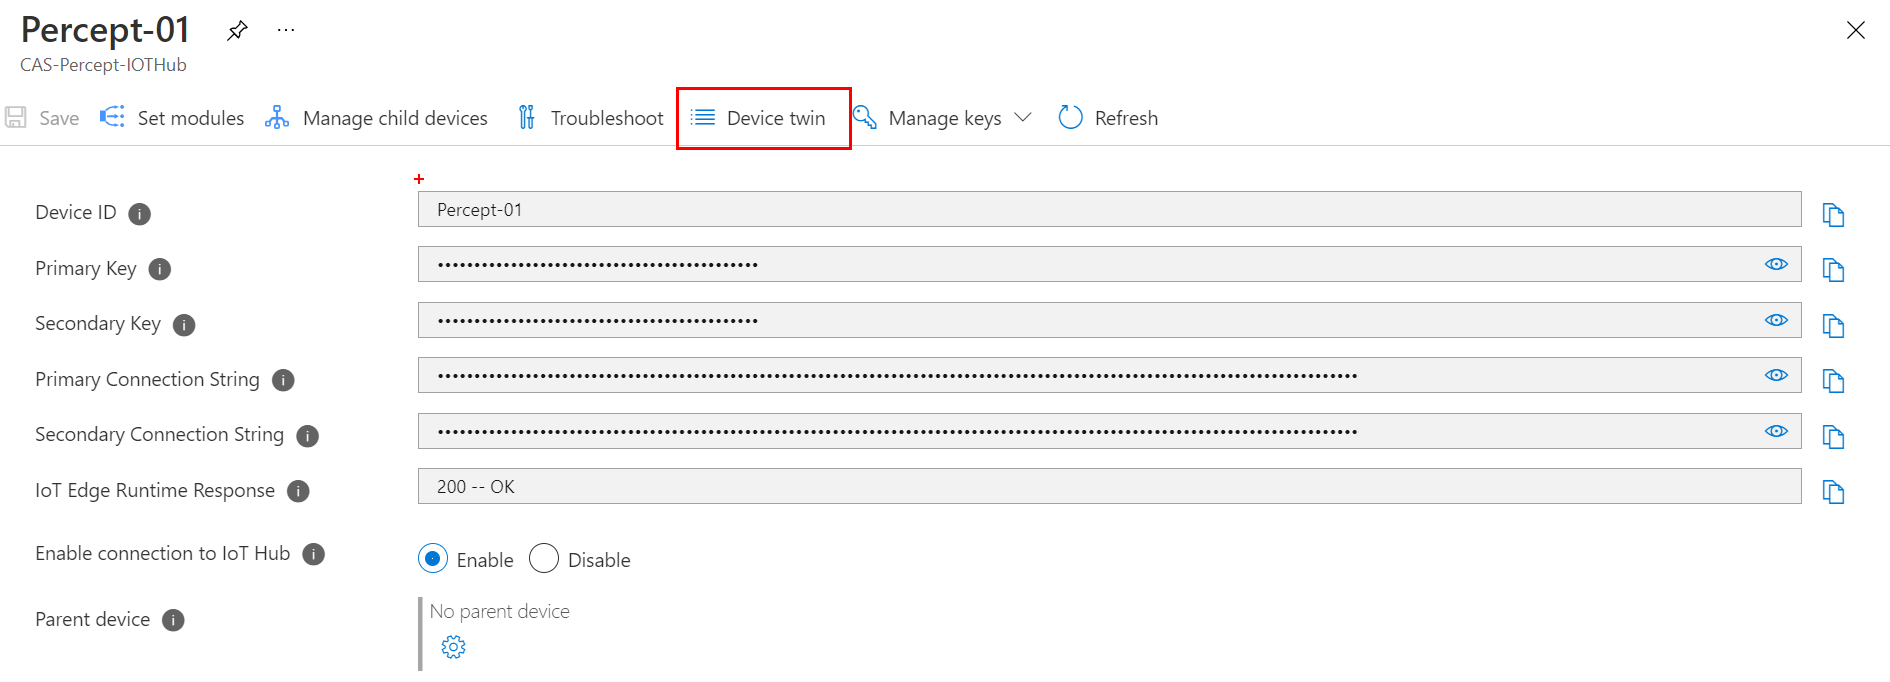
Click the Device Twin link at the top to open the Device Twin for this device.
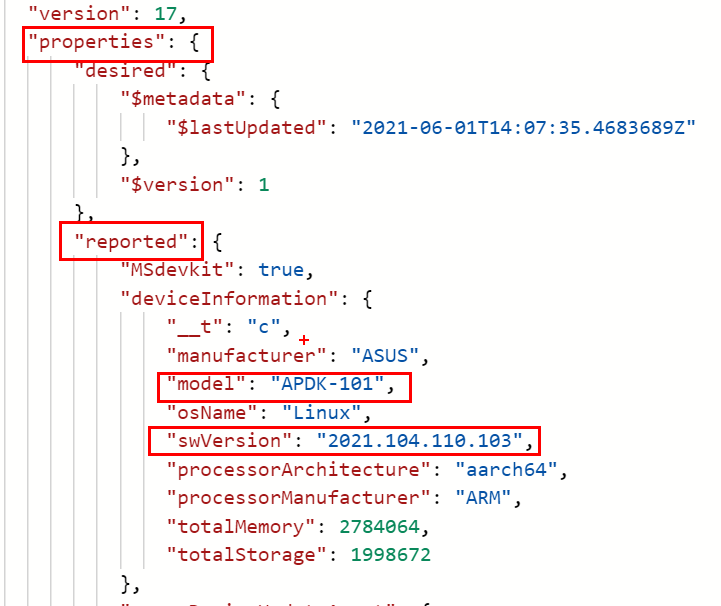
Under the Properties -> Reported -> Model you can see the model of your Device and also the SWVersion that is currently loaded onto the device.
Which version of the Software do we need?
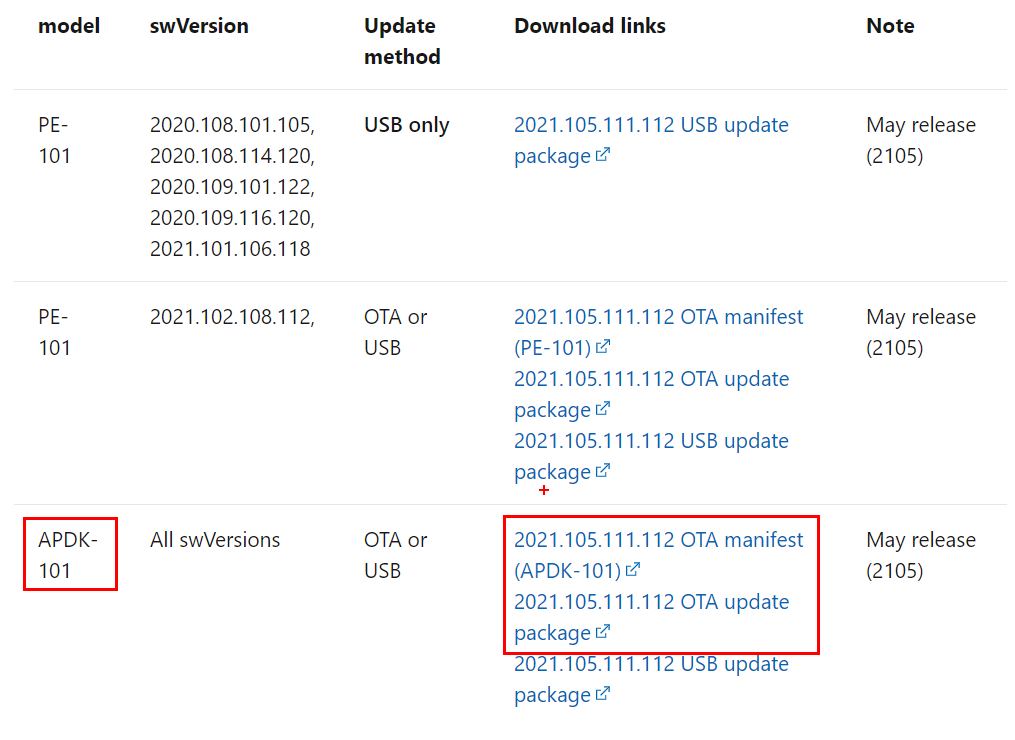
Now that we know the version that is loaded onto our device and what version of the device we have on our system we can look to download the correct update file. Head out to the Docs.Microsoft.com page and scroll down until you see the list of available Updates. In the left column find the model that matches your device model you found earlier and then from the download links column you need to download 2 files. The first is the OTA Manifest and the second is the OTA Update Package. You don’t need the USB version as we are using the Over The Air updates.
You can do USB updates but doing via OTA means that it's easier to update later as well...
Setup the Device Updates
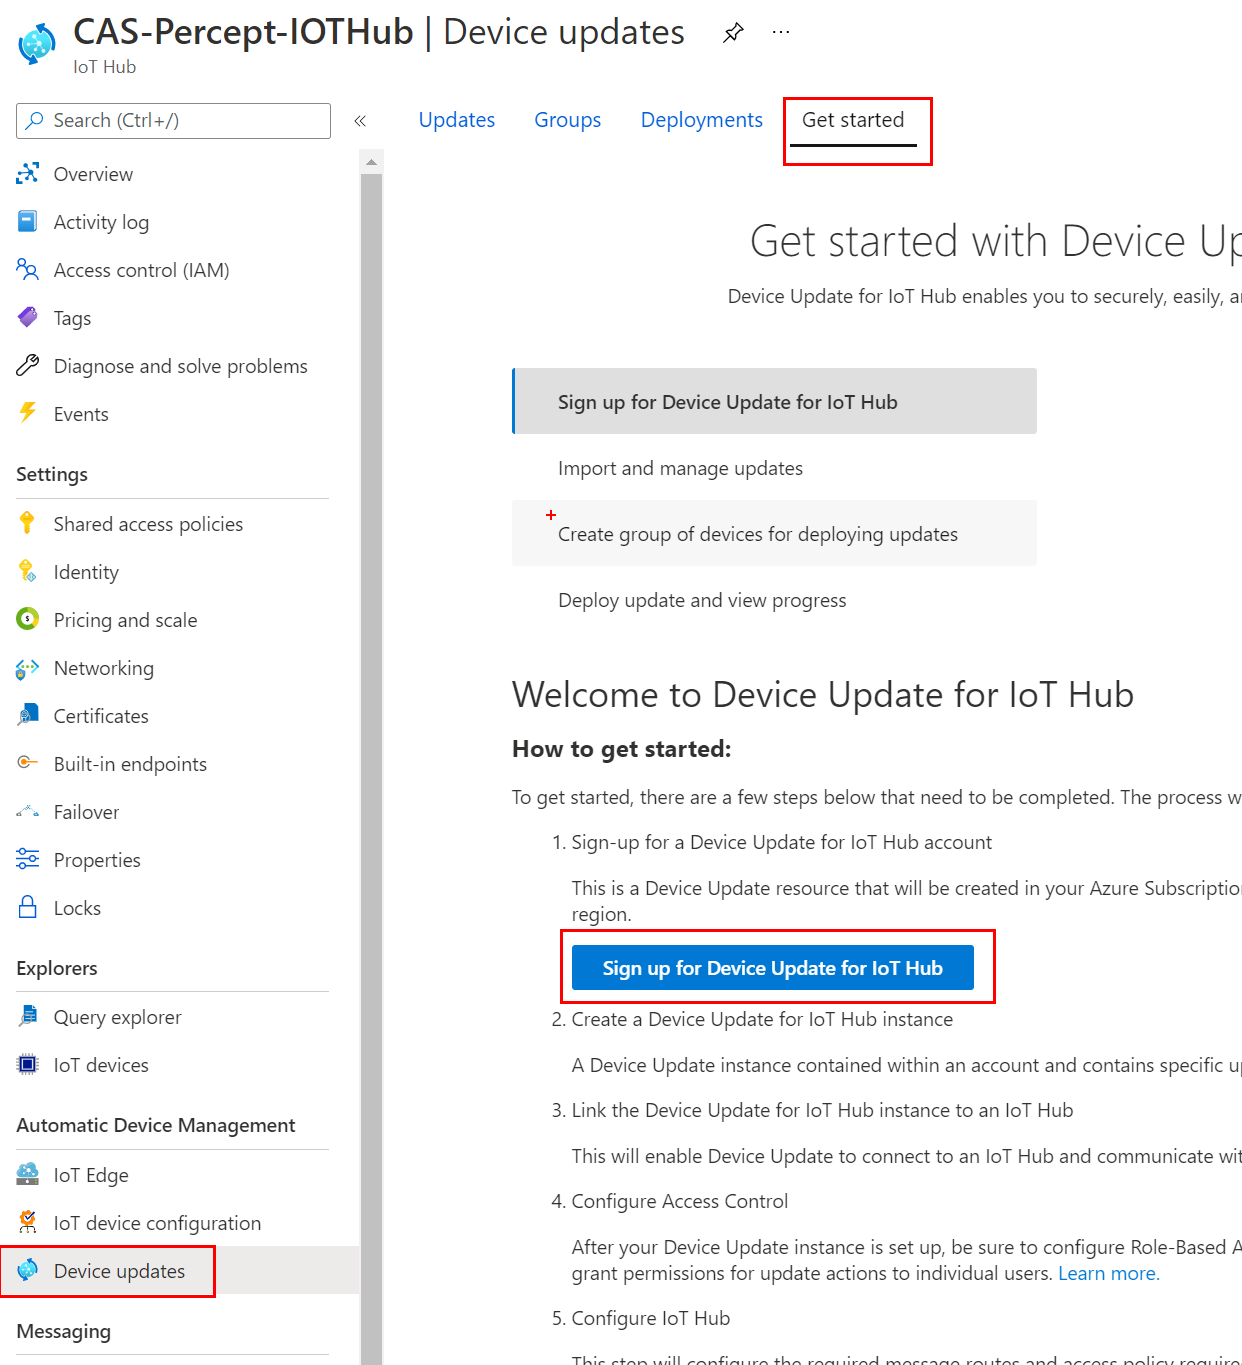
Back on the IoT Hub for our devices on the left pane scroll down to the Automatic Device Management section and open the Device Updates blade.
The OTA Update Docs Page is a little wrong here as it says Select the Updates tab but first you need to sign up for the updates to work. Instead head to the Getting started tab and click the Sign up for Device Update for IoT Hub button.
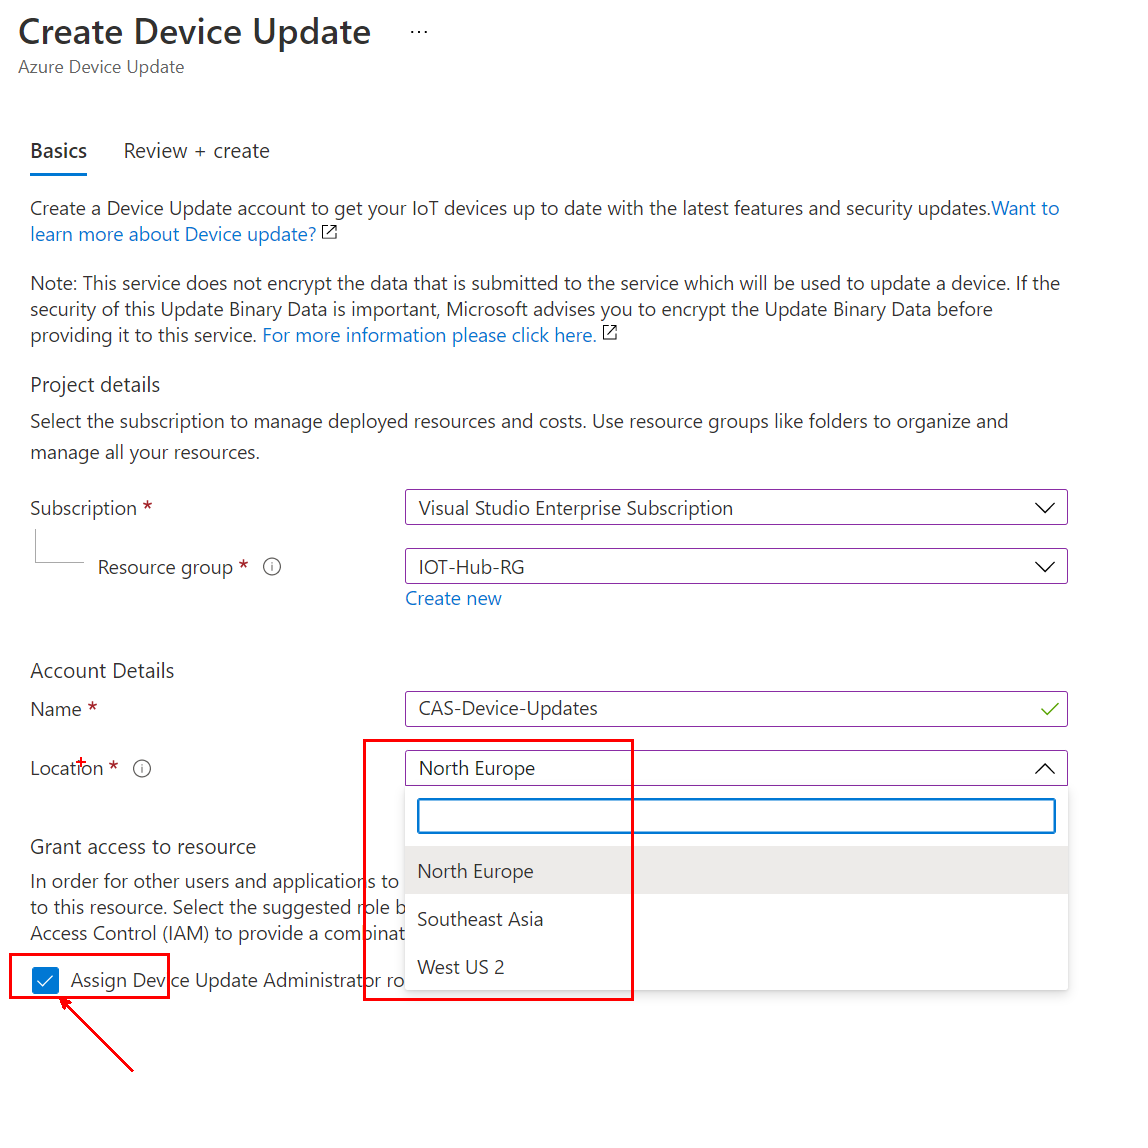
It will ask you to create an account with a Resource Group etc but it’s all free (Well at the time of writing it is anyway…) the important parts here are that the ‘Location’ only has (At time of writing!) 3 global locations but more will be coming soon and also make sure you click the Assign Device UpdateAdministrator Role as you will need this role later in the process. Remember to click the review and create at the bottom.
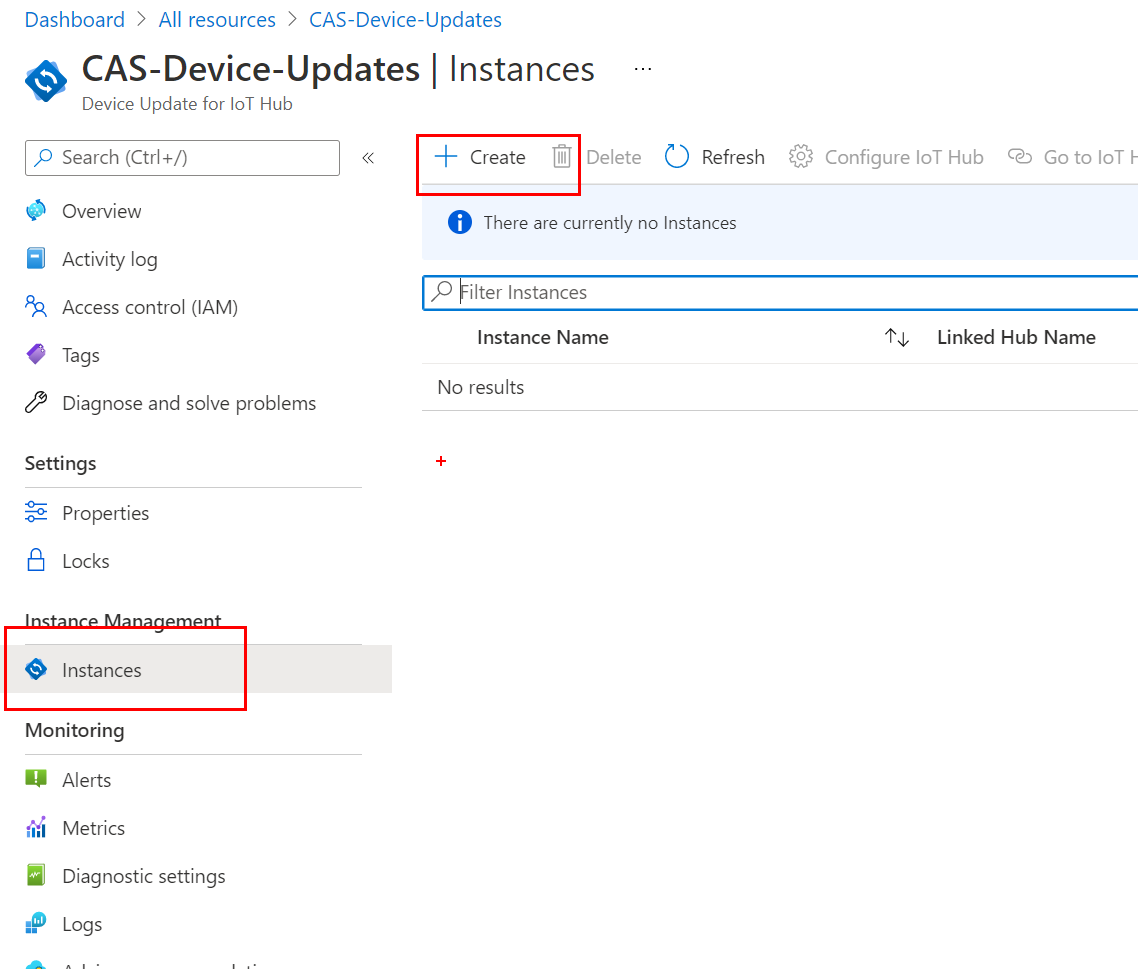
Go to the New Resource you created for your Device Update IOT Hub and go into the Instances Blade and then click Create at the top
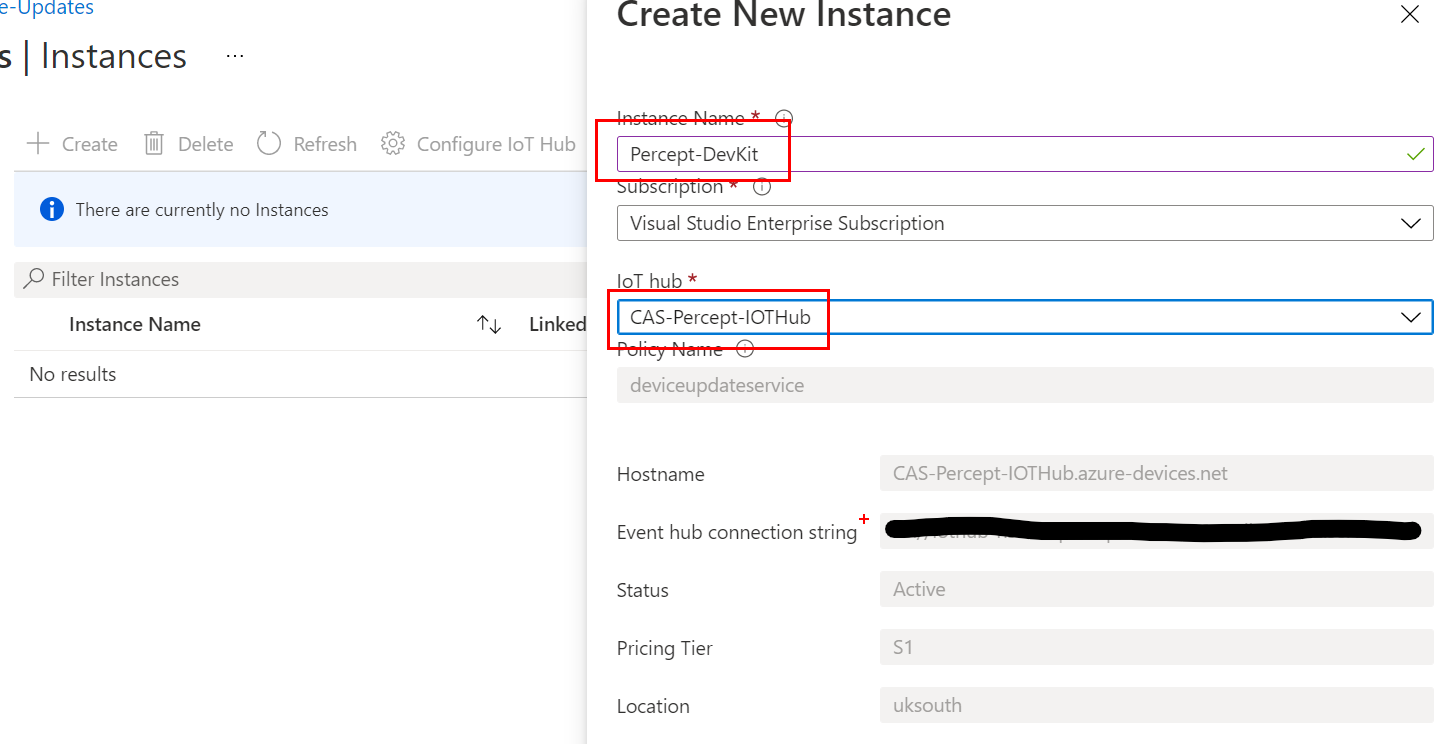
When creating the instance give it a meaningful name and then from the drop down select the IOTHub that you created earlier for your Percept so in my case the one I created was CAS-Percept-IOTHub, obviously don’t forget to click create at the bottom. This will then link the new Device Updates instance to the IoT Hub that has all your devices.
This process can take a while it was over 5 minutes for me (I had time to go make an IoTEA) but let it whirl away and eventually you will see the new instance appear in the list, however it may say under the Provisioning State Accepted and if you click refresh it may say Creating this means it’s still working so give it a bit longer. What you are looking for after clicking refresh is this state to say Succeeded.

Configure the IoT Hub
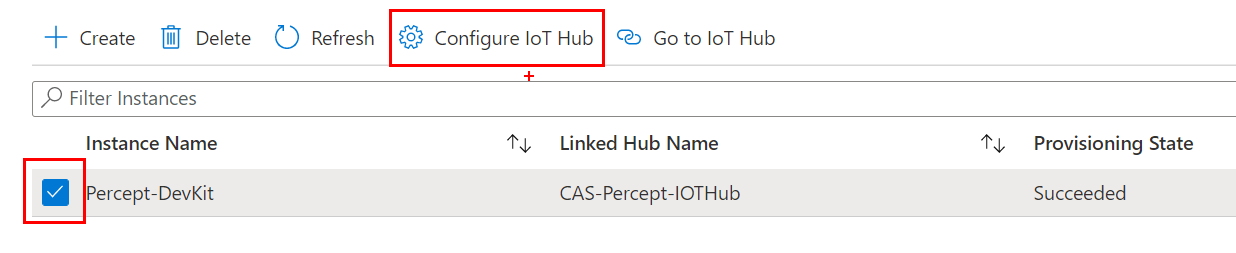
Now this bit had me for a moment as it’s not very well explained you need to select the new instance but not go into it instead tick the checkbox on the left of the Instance Name and then click Configure IoT Hub so that we can set-up the instance.
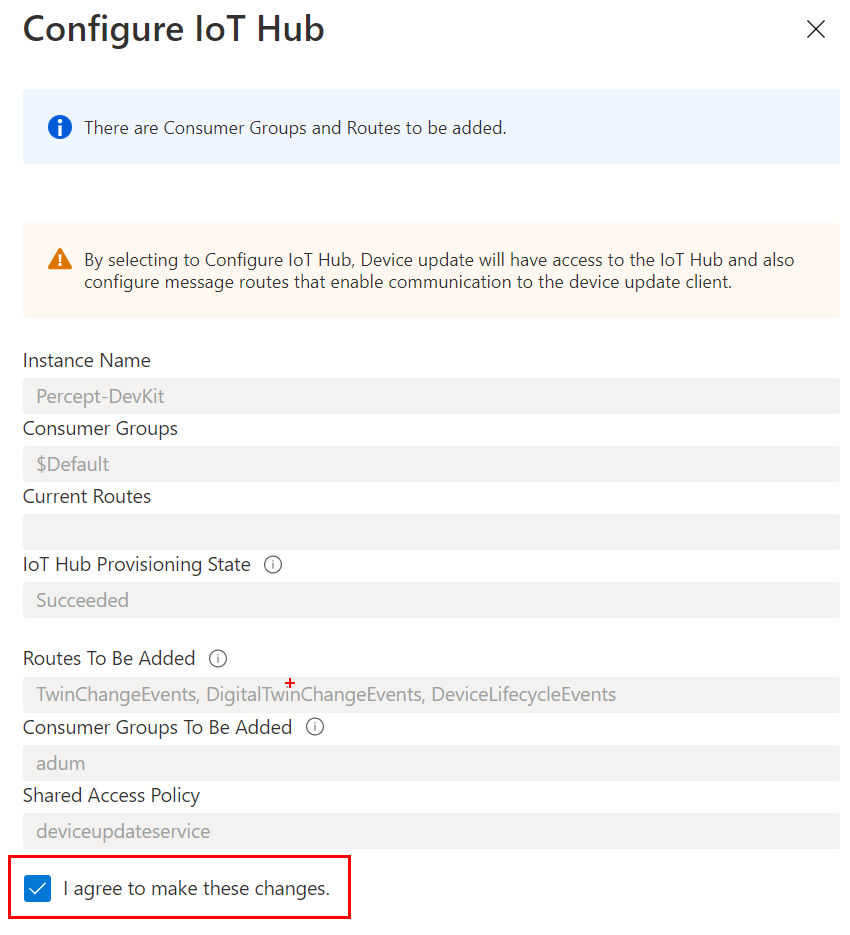
You will notice that when the blade opens the info box at the top changes a few times as things update, you need to check your happy with the details and then check the I Agree to make these changes and click Update at the bottom.
If you are using a Free tier of Azure IoT Hub, the allowed number of message routes are limited to 5. Device Update for IoT Hub needs to configure 4 message routes to work as expected.
Update Security
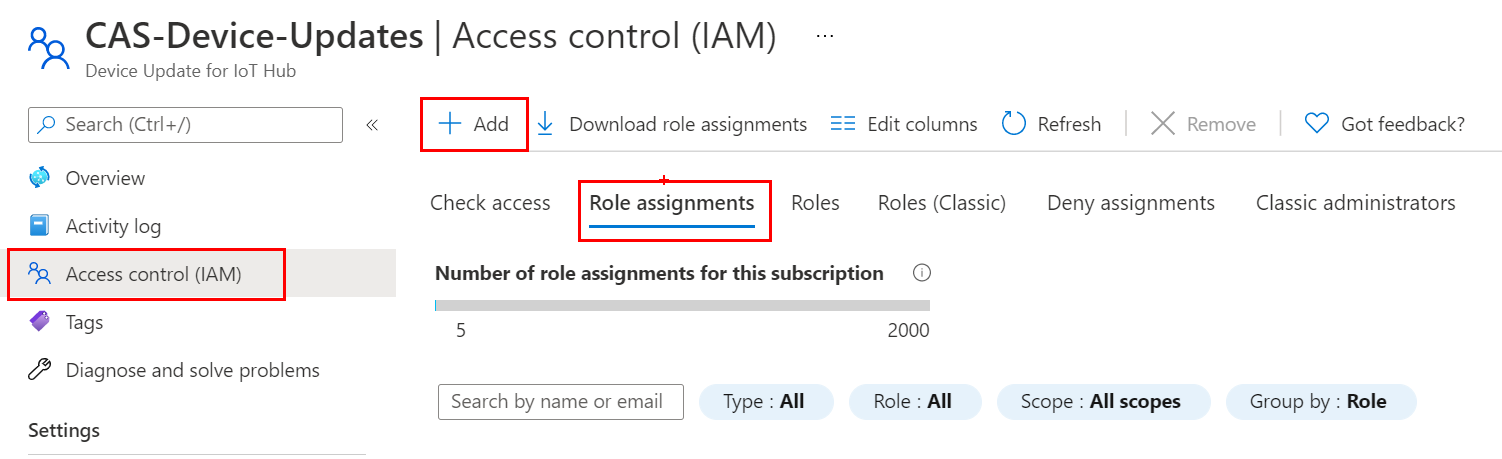
We have now created our Update Account as well as an Update Instance but we now need to do the security part by giving it the access control it needs. So on the left near the top of the screen select the Access Control (IAM) blade and then Role Assignments
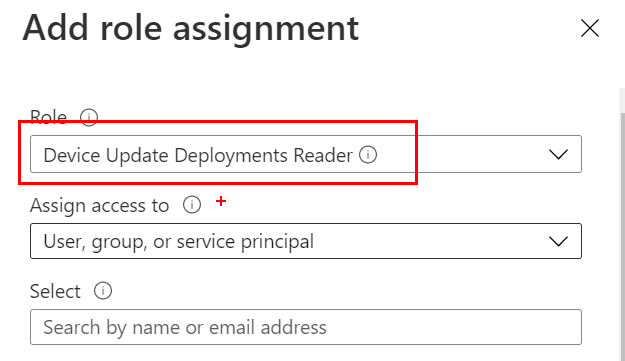
Now click Add at the top of the pane and then from the drop down Add Role Assignment and in the new blade that appears you need to give a role, now the docs suggest it can be any of the following:
Device Update Administrator
Device Update Reader
Device Update Content Administrator
Device Update Content Reader
Device Update Deployments Administrator
Device Update Deployments Reader
And I will leave you to pick one but remember with Security its always best to assign the least privileges needed to achieve the task and no more. This means if the account is compromised the damage is limited. For me I selected the last option as it’s the most limiting and allows Read access only.
Now you need to assign this access to a User or Azure AD Group and in my case as this is a Demo Set-up I have assigned to myself, click save and hey presto you are now ready
Back to Device Updates and the Docs!
So now we have the Device Updates part set-up we can return to the IoT Hub and actually complete the device Update. This time when we go into the Device Updates blade we will not be presented with the Getting started pane this is all set-up and completed so we can now go to the Updates tab and click the Import a new Update
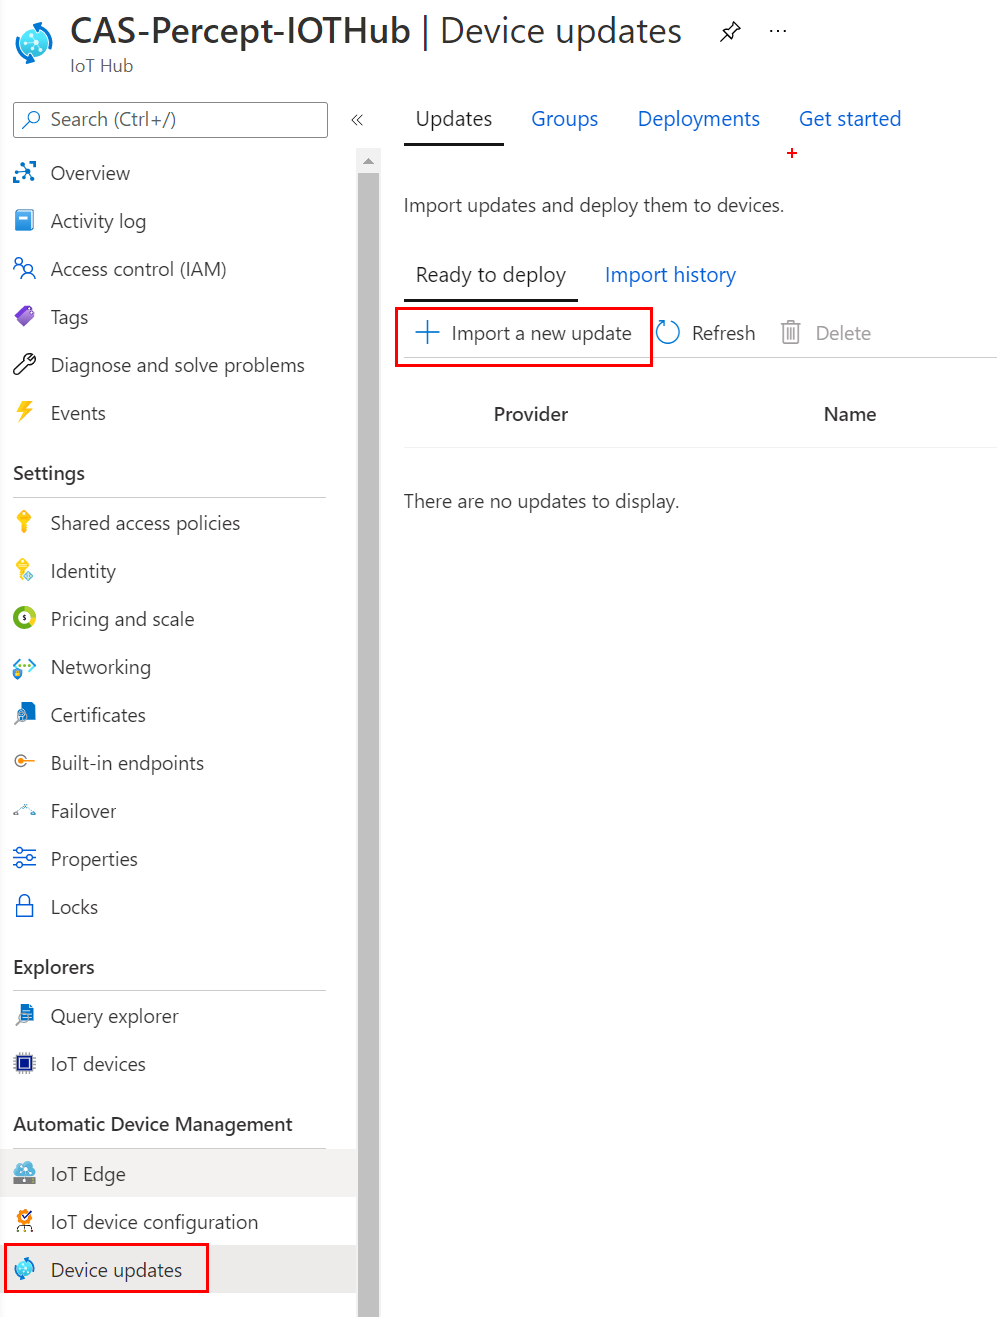
Remember the files we downloaded earlier now is the time we can use them so in the ‘Import a new update’ blade select the files in the appropriate boxes for Manifest and Update Files. We also need to create a Container that will hold these files within Azure so that the devices can download them so click the Storage Container as well to create a new one.
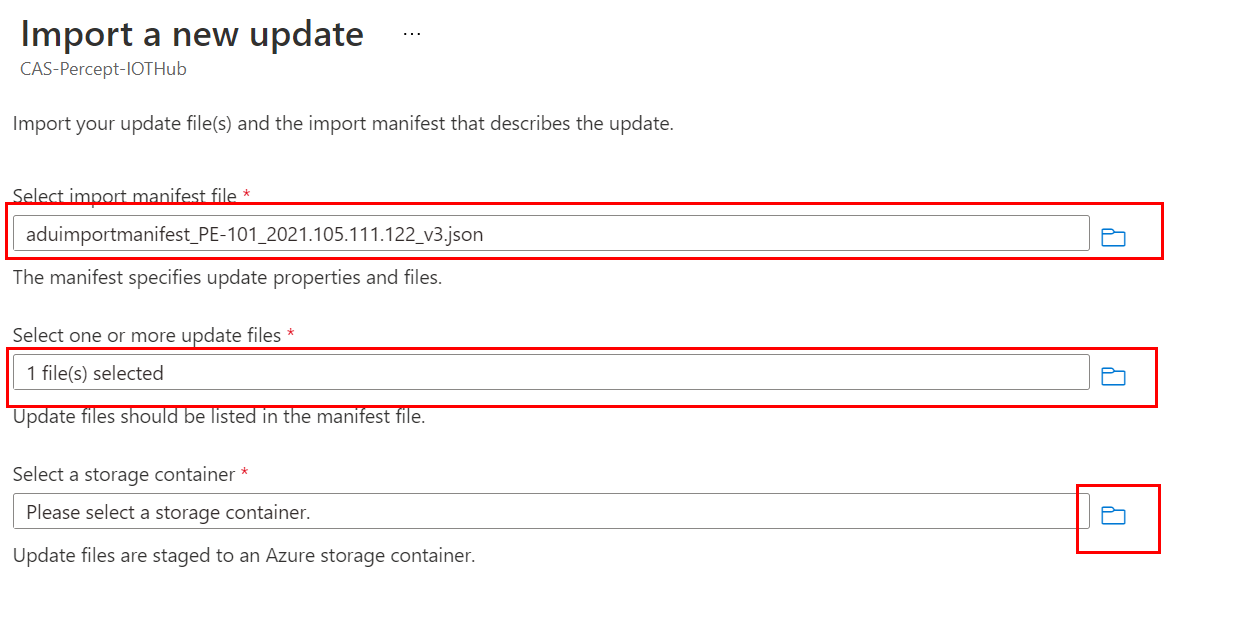
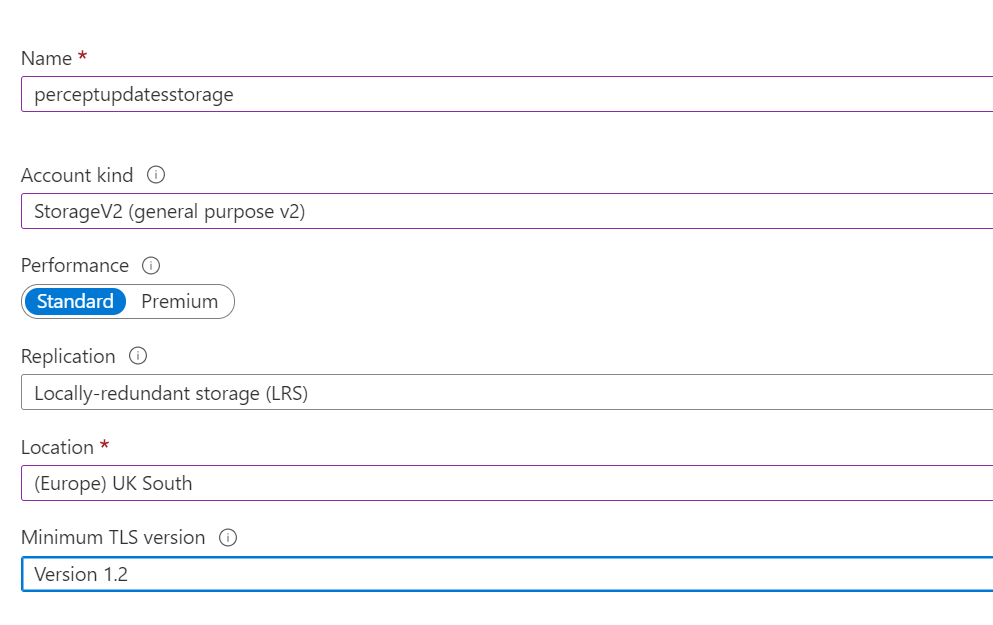
Click the ‘+ Storage Account’ at the top to create a new storage account and give it a meaningful name. I changed the ‘Account Kind’ to StroageV2 as well and set the location to the same region as my IoT Hub so it was all together, don’t forget to click Ok at the bottom for it to create.
You will when it’s created be taken back to the list of you storage accounts so select the one you just created from the list, and now you need to add a container to actually hold the files within the Storage Account.
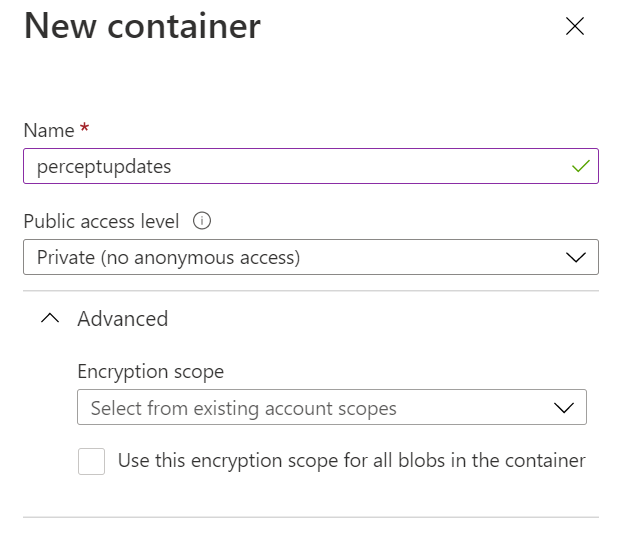
Once it’s created and you are shown the list of containers in the new Storage Account you can select it and click select at the bottom of the page. Now you are returned to the Import a new update blade where you can now click the Import Update button at the bottom of the page.
You may be asked to add a Cross Origin Request (CORS) rule to access the selected storage container. Select Add rule and retry to proceed.
This Import again takes a good 3-5 minutes so that cup of tea might be empty so go stretch your legs and make a new one, it’s OK I’ll wait here for you…
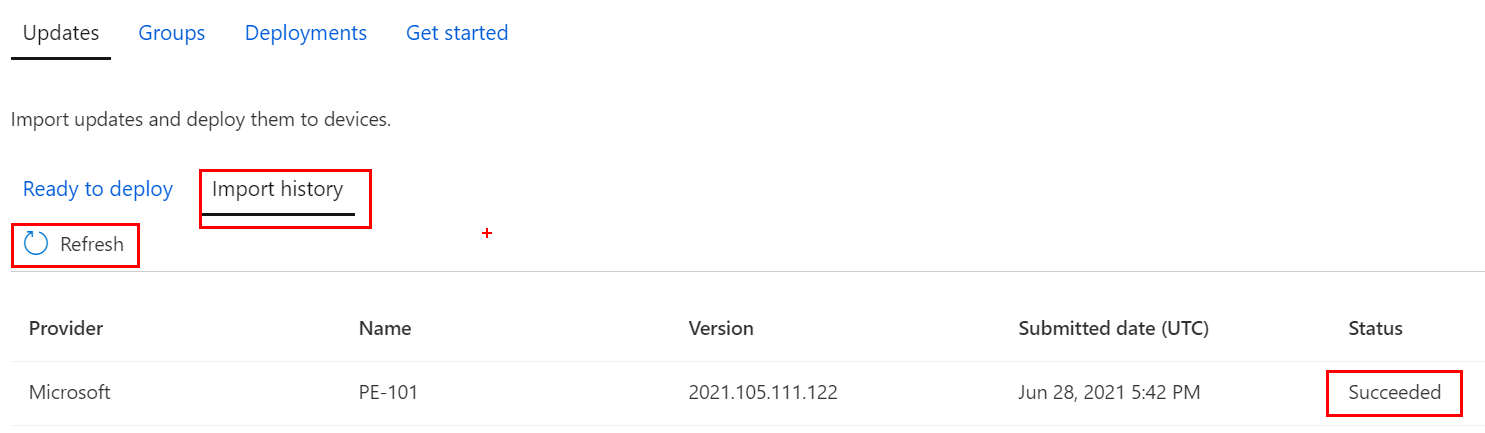
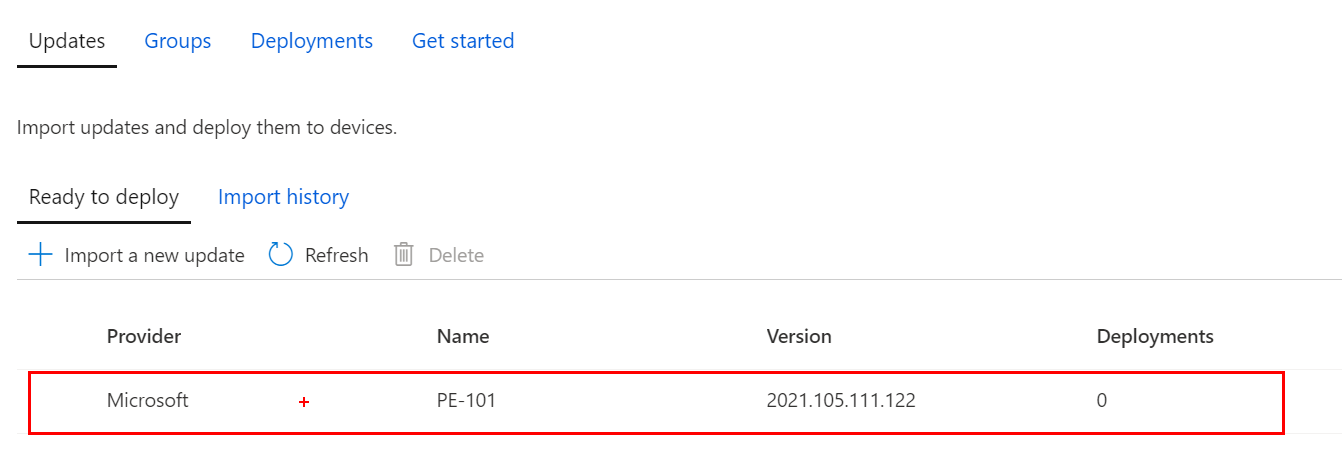
You will know when it’s done as the Status will show Succeeded you will need to click the Refresh button a few times and then you can go into the Ready to deploy to check it’s there and ready.
Create an Update Group
Now it’s not at first obvious as you may like me only have one device in front of you but the Azure setup is designed for you to have 10’s if not 100’s of devices that need updating and hence the OTA system. This means that you may want to create groups so that you can update a specific set of devices within your infrastructure maybe for testing or failover protection etc if the Update fails for example.
It’s the creation of the Update groups that is next so lets get started…
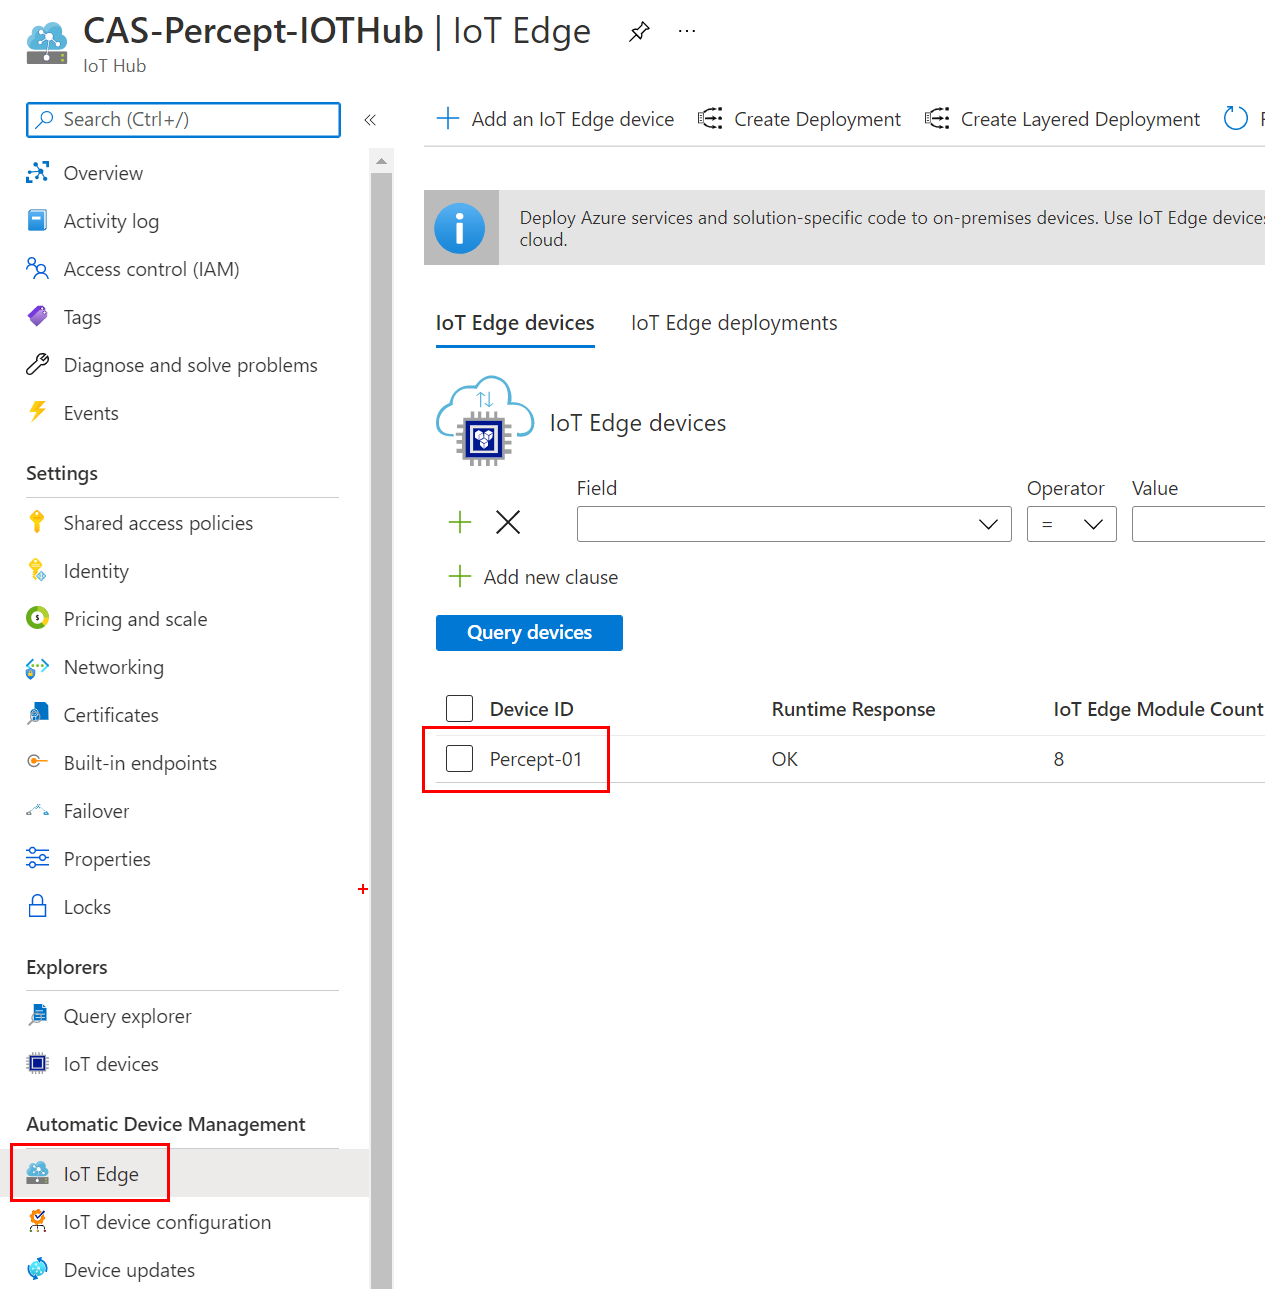
Head over to your IoT Hub and select the IoT Edge blade and then your device (Yes you have to do it one by one here for the moment!) and then at the top of the next pane select the Device Twin
Adding a Device Twin Tag
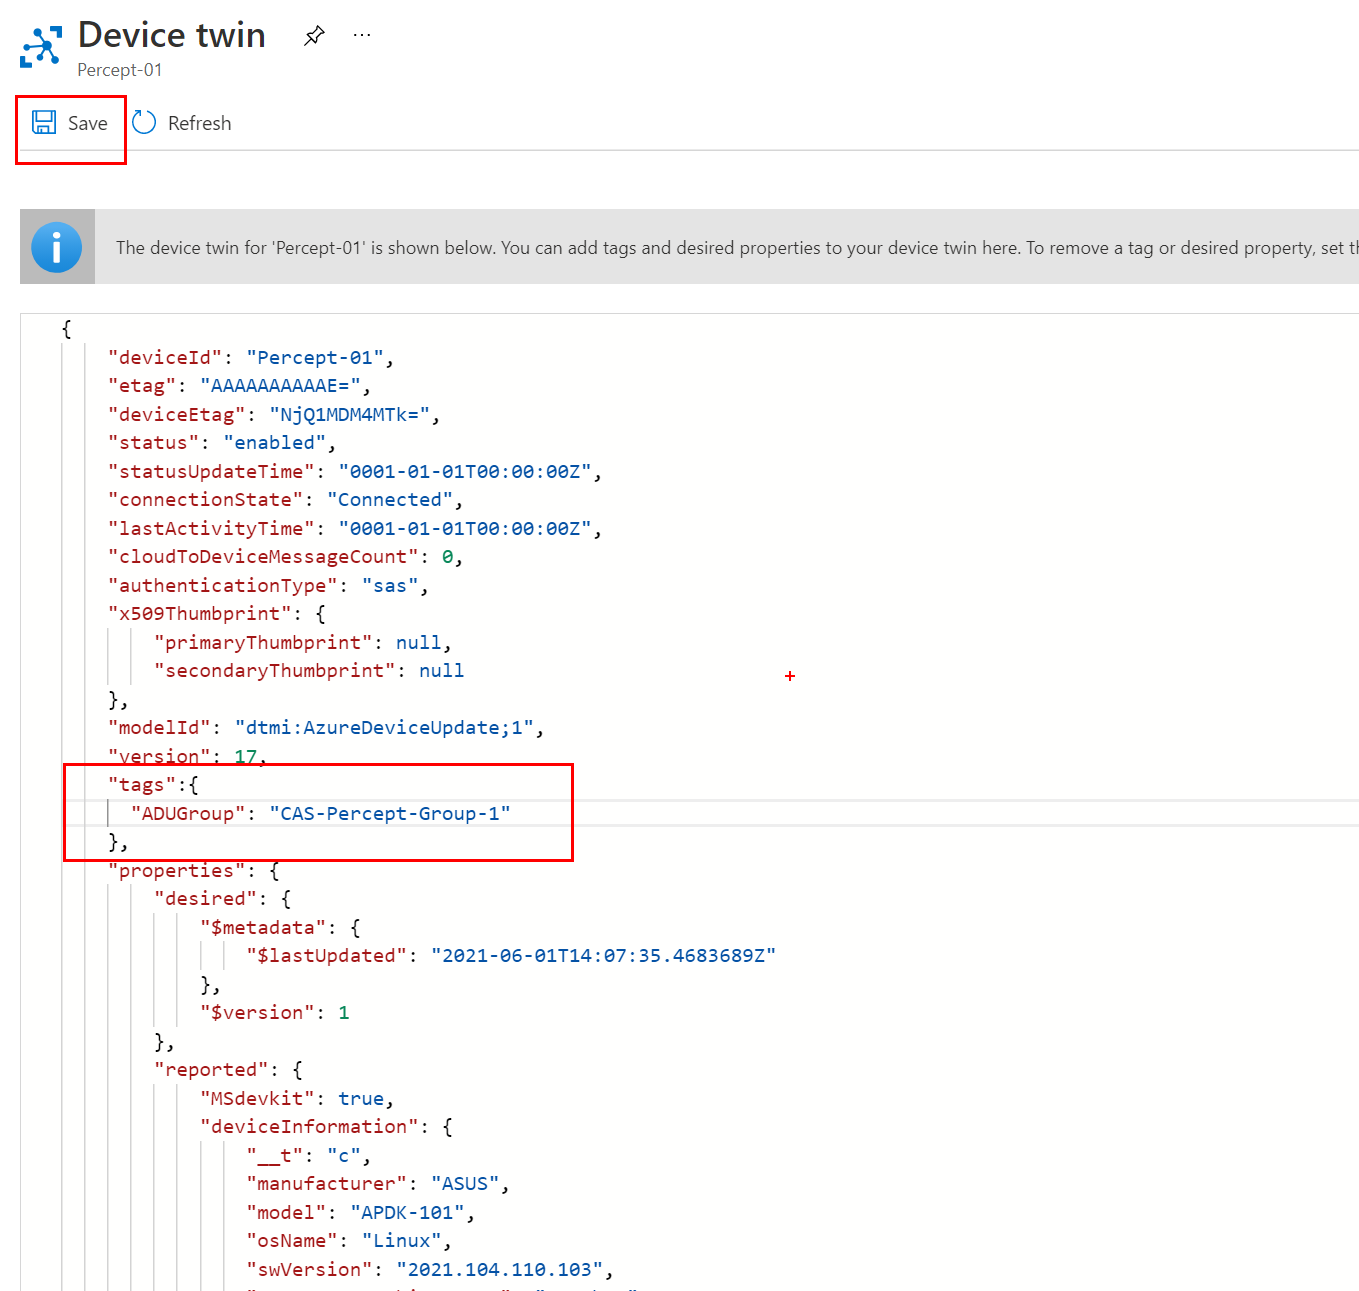
Now you should be able to see your Device Twin list and you will need to add in a new Document Tag and you can read more about those here
Tags - A section of the JSON document that the solution backend can read from and write to. Tags are not visible to device apps.

NOTE - The `tags` NEEDS to be lowercase for this to work...
You will need to add into this Property a key of ADUGroup and for the value the name you want to call your group so in my example it’s CAS-Percept-Group-1 and as always don’t forget to click the save button at the top. I have done it more than once and wondered why it’s not working and it’s down to me not clicking save again…
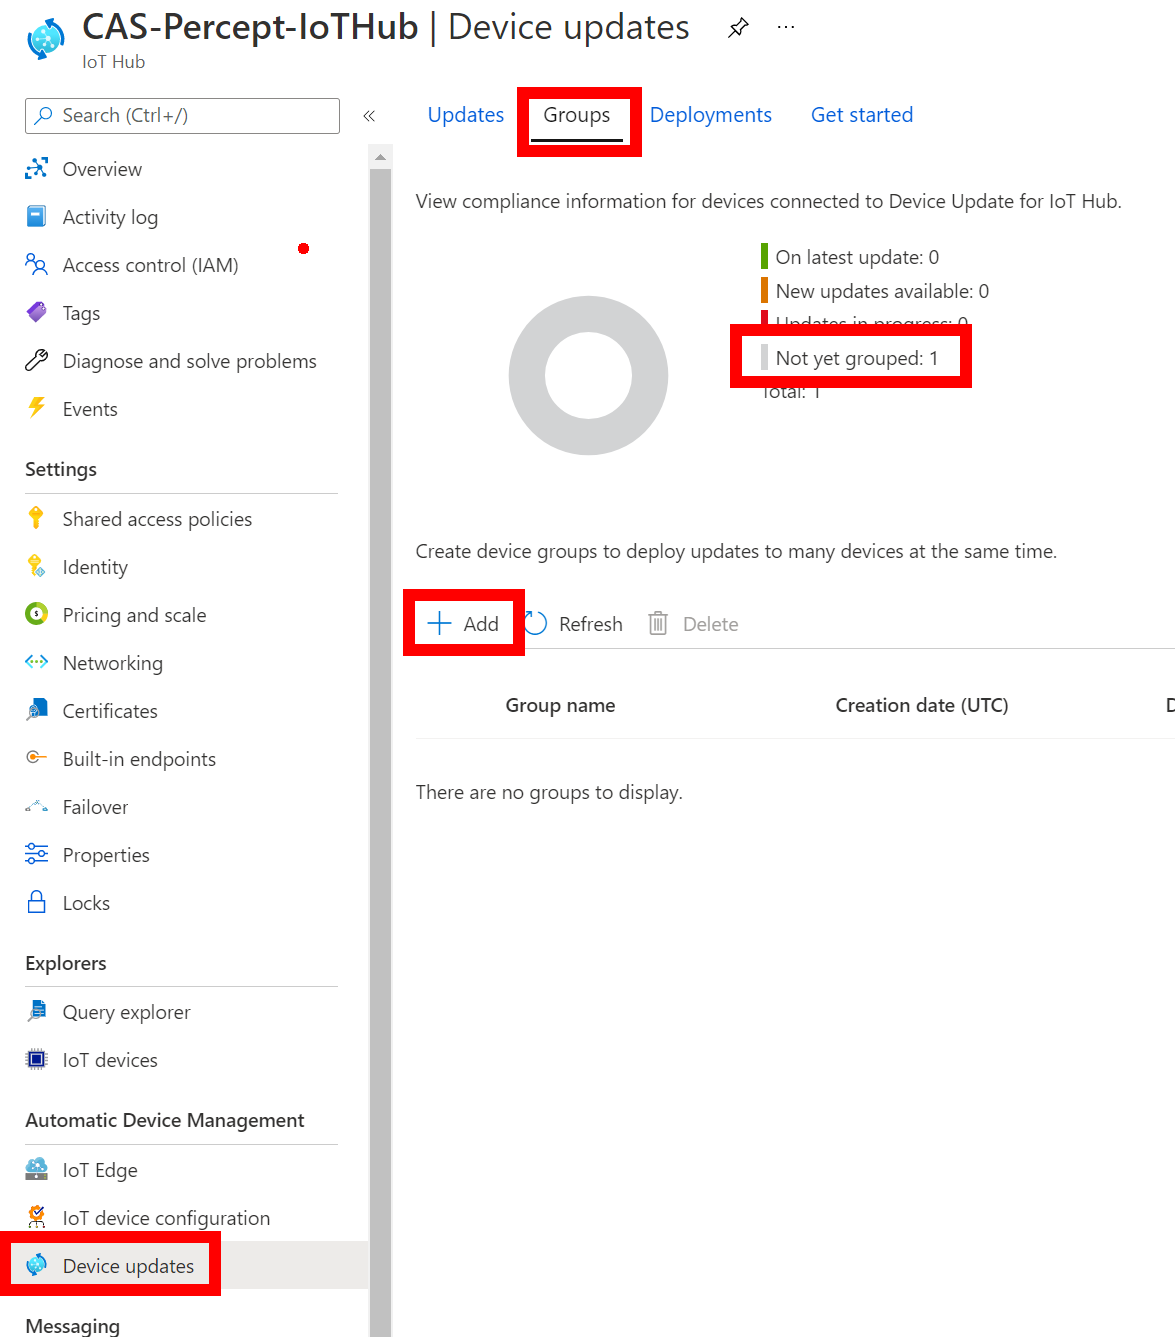
Now we have the Device Twin Tags set we can go back to the Device Updates blade in the IoTHub and this time select the Groups tag at the top. This time you will see that you will have a device against the Not Yet Grouped showing that the Device Twin has been picked up by the system and your device is awaiting a group assignment. Click the Add Button so that we can add a group assignment.
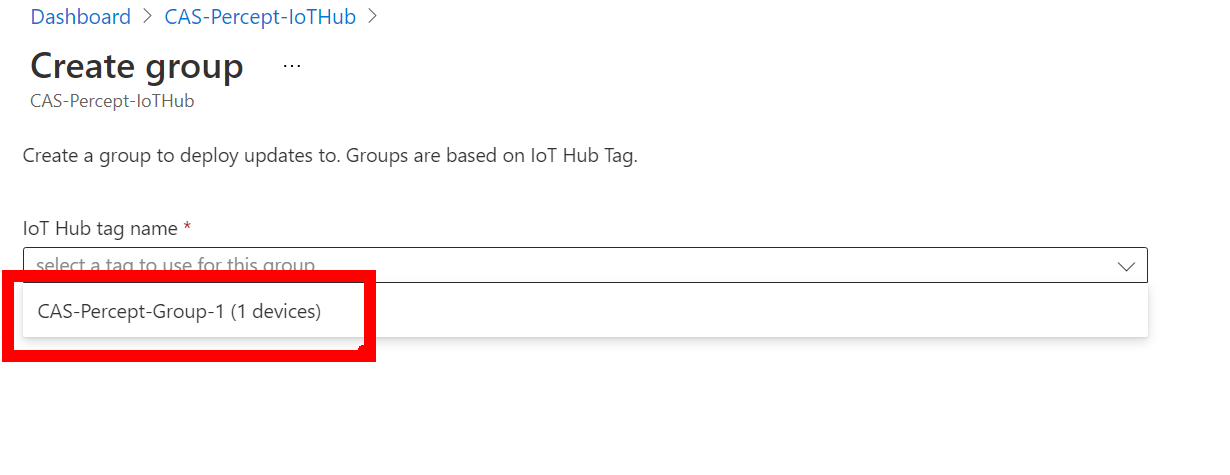
On the new page drop down your list and you will see the Group Name you used in the Device Twin and this shows the power of the Twins system as you can add these Twin Tags when you enrol the devices using a service like DPS (Device Provisioning Service) and if the Group has already been created the device will add itself to that group ready for a group update when needed. Again don’t forget the Create Group button at the bottom of the page.
Deploying the Update
After creating the Group you will be returned to the Groups page and it will show that the device has been Assigned the group and also if the Update package you uploaded previously is newer that the package on the device it will show that there is an Update Available.
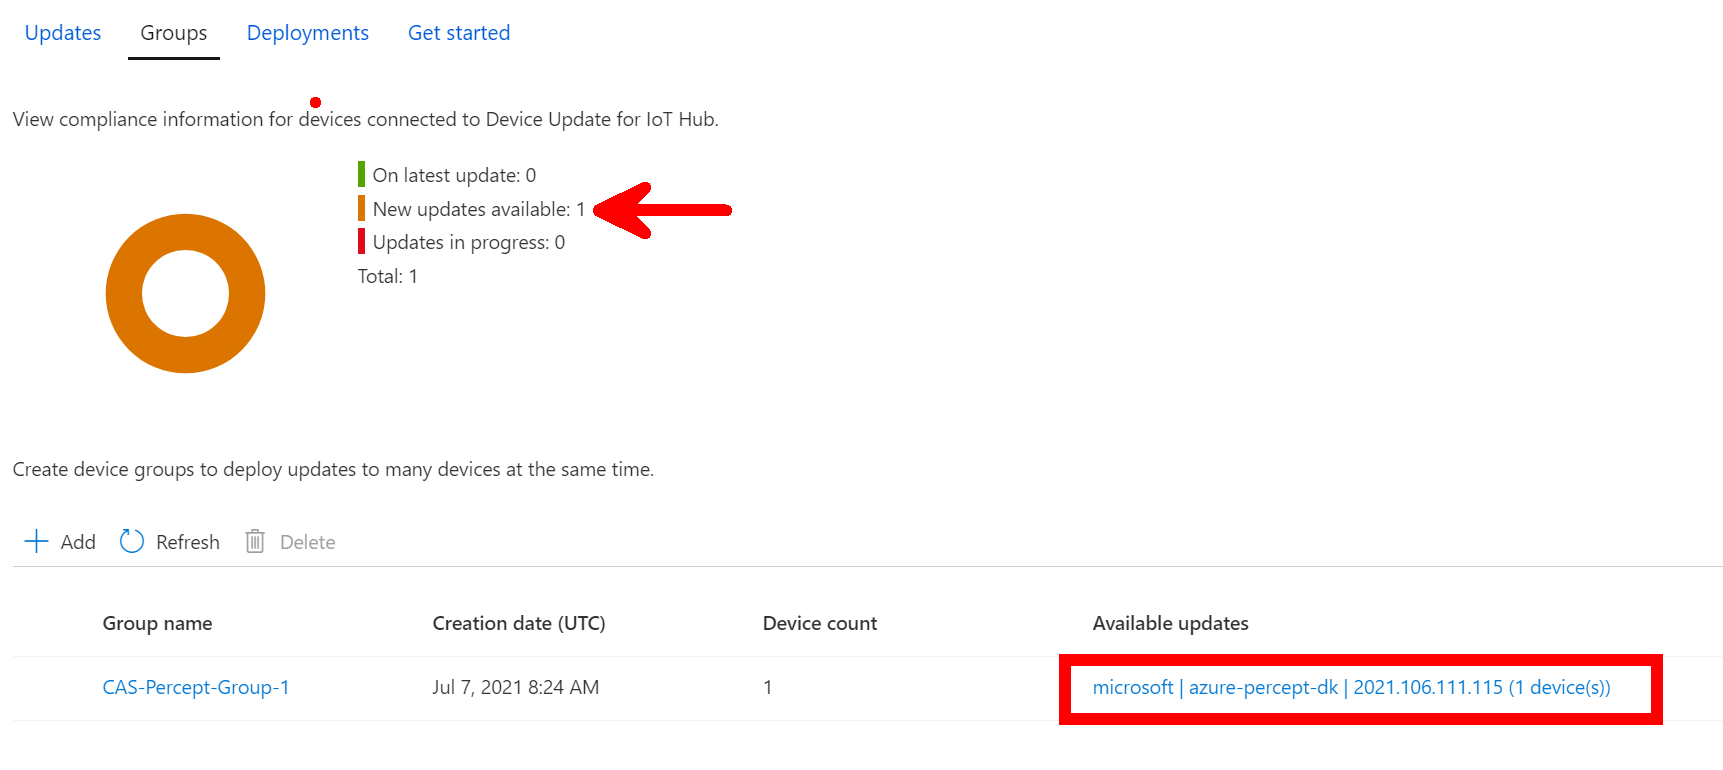
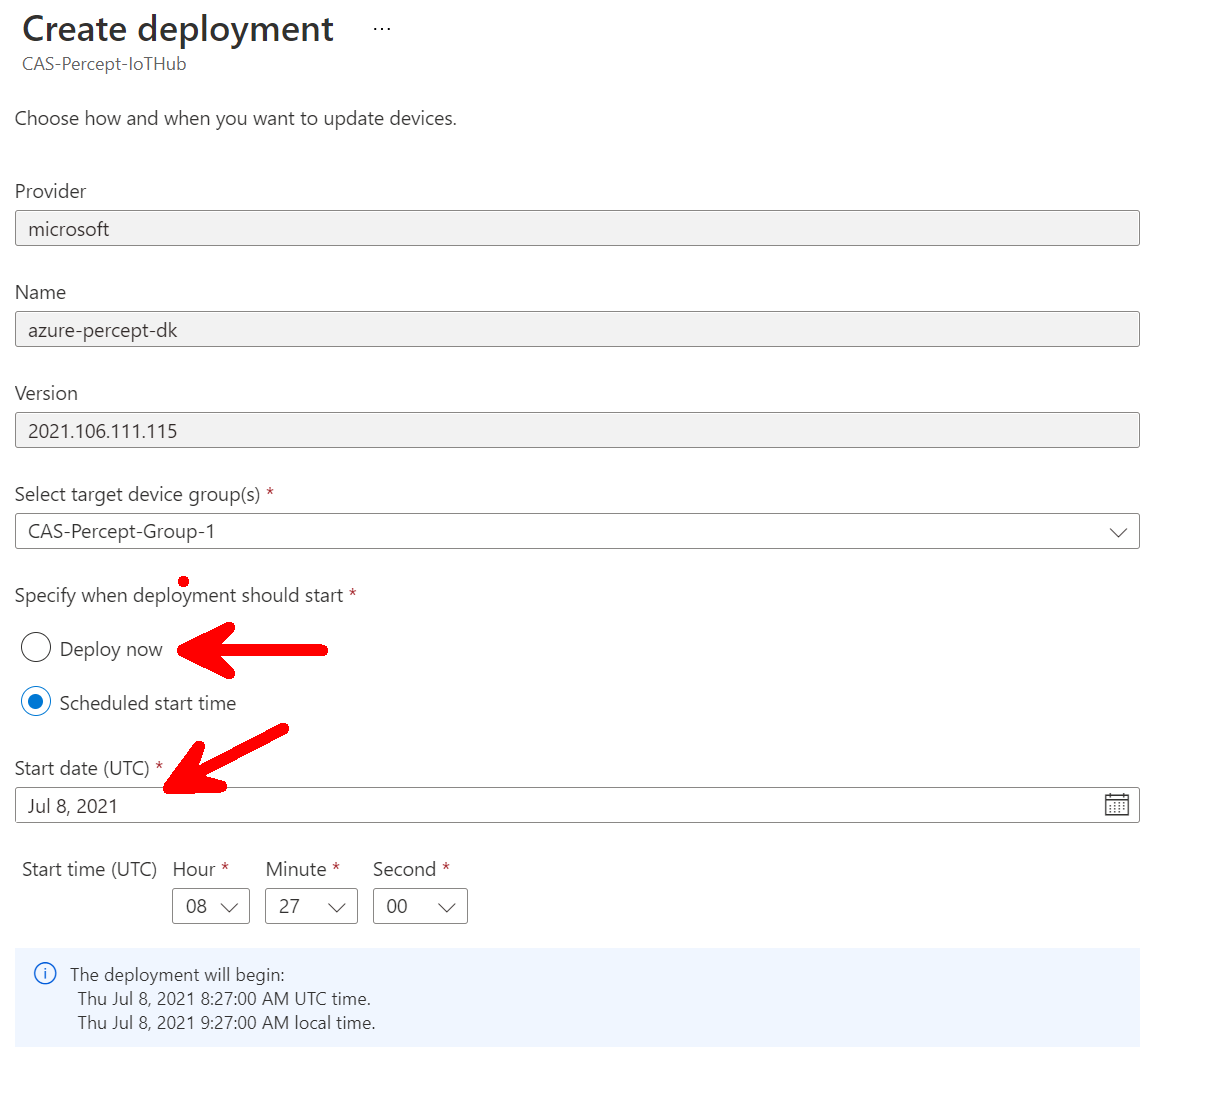
If you click the Available Updates link for the group it will take you through to the Deployments page so that you can deploy the Update. On this page you can either use the Deploy Now or schedule a deployment for a date and time of your choosing, maybe an overnight update so that production isn’t affected for example. Click the Create Deployment at the bottom of the page and your taken back to the Groups Pane after the Deployment has been created.
Monitoring the Deployment
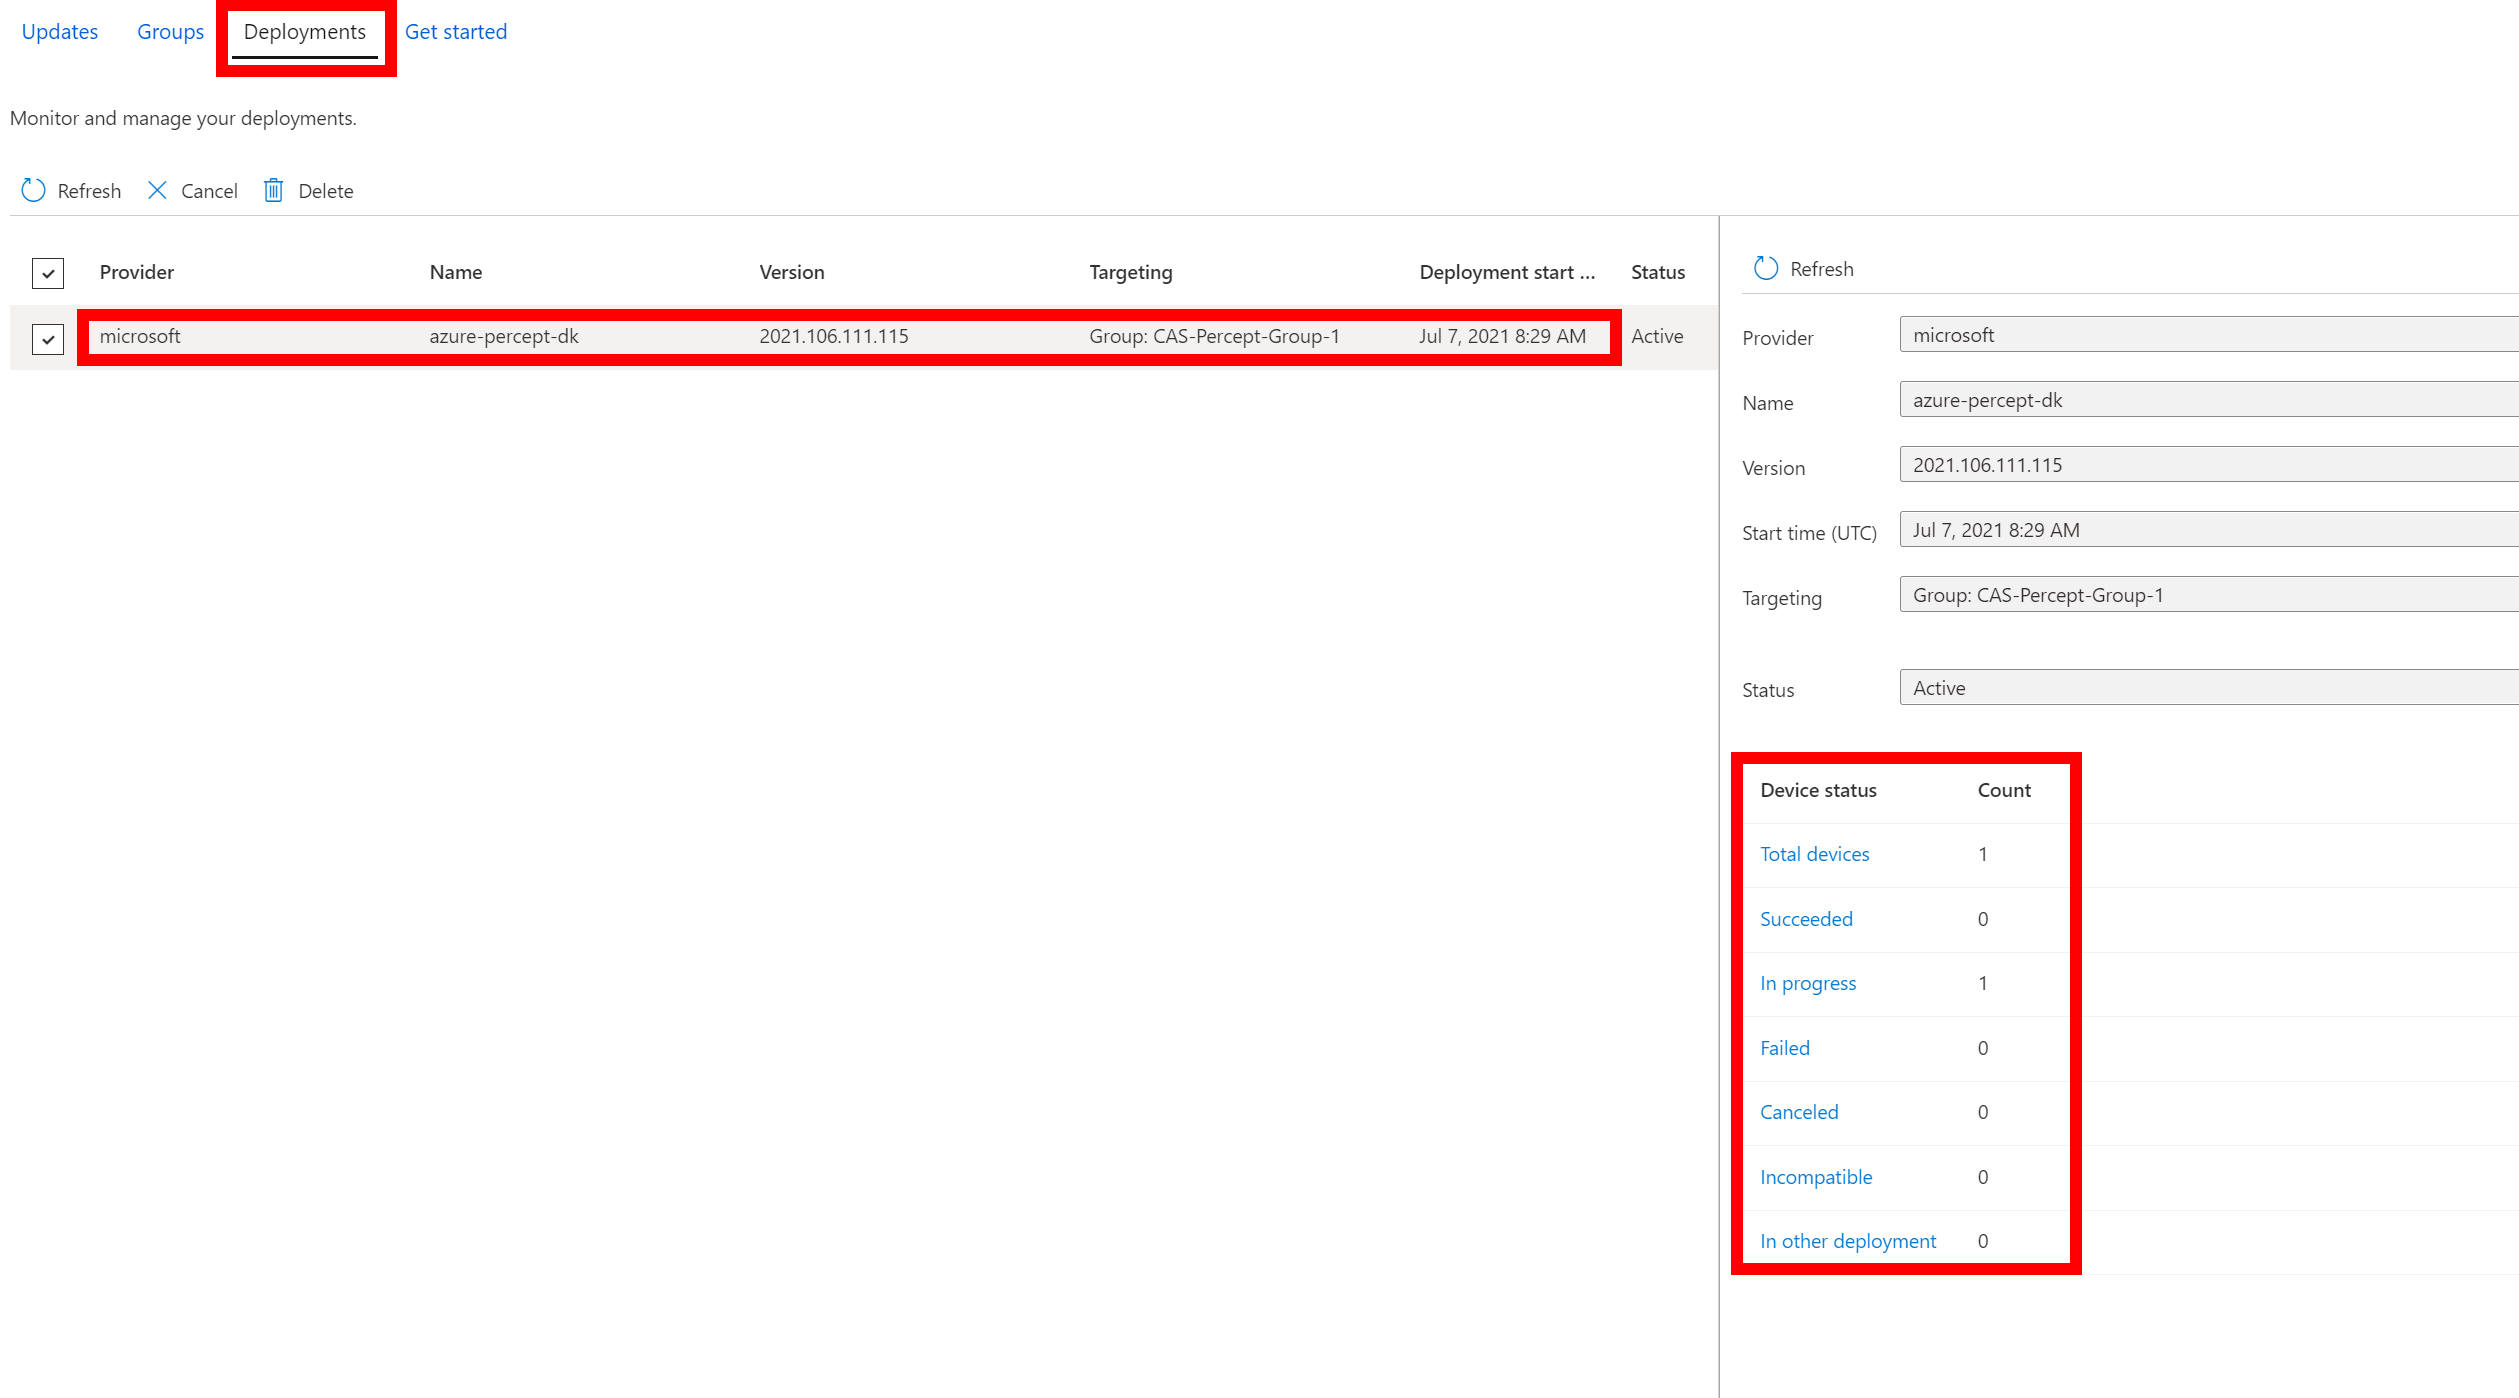
It seems anti-climatic that the deployment has been created and it’s scheduled but has it happened, what’s happening how can you monitor it? Well if you click the Deployments tab at the top of the Pane you can then click your new listed deployment (It’s not obvious your supposed to click it…) and you will be shown a new pane with the details of the deployment for you to monitor. Here you can see that there is 1 in progress and once it’s complete it will show if it Succeeded or failed etc. It takes a while for the Update to actually happen as it needs to not only send the files to the device but the files are loaded besides the currently running OS and then it needs to switch them so now you have reached this point go and celebrate with a nice cup of IoTea and maybe that Chocolate biscuit you was saving.
Conclusion
This has been a long post much longer than the Docs but I like to show screen shots of what the pages look like and I hope you have seen that I pointed out some of the little gotchas along the way as well. Personally I think being able to use the OTA system to update Azure IoT Edge devices is a game changer as no longer will a company need to dispatch a tech to a remote far off part of the system with a laptop to load the latest version of firmware from the Dev team it can be done by the team from the Office.
Maybe at some point someone will write a Azure Pipeline Deployment target so that the uploading of the Packages can be automated as well, now wouldn’t that be good.
I hope this has helped and if you have any questions you can reach out to me on Twitter or LinkedIn or obviously reach out to the Microsoft IoT team they would love to hear your ideas and feedback.
Happy Coding
Cliff.