TOC
Where are we?
In the last post we cover the Why and How to prepare for migrating your Xamarin App to DotNet MAUI, we also gave you some ideas and suggestions for planning the migration and prepping the story and sprint.
In this post we will start with the actual migration story and hopefully help you on your journey, so grab a fresh coffee and lets start.
Manual or Automated Migration?
Now we have a plan for our Migration, and we have also worked out what will work in the new migrated version and what will need to be replaced we can start with the actual migration.
We now have 2 choices to pick from do you follow the Manual Migration which is detailed Here or use the semi-automated .NET Upgrade Assistant Tool which is currently a Windows only CLI tool but there is a Mac version coming soon.
I had found that until recently the best path was to use the Manual method as the Automated tool caused more issues that it fixed but with recent updates the Upgrade Assistant tool is now very good and gets you a large part of the way but still not 100% as it’s an Assistant Tool (It’s right there in the name 😉).
I’m not going to talk more about the Manual process as this is detailed very well in that GitHub Wiki.
Start the Migration
So, you created the new branch, you did right! The whole team know to not carry out any work on the Xamarin project/repo! We will be deleting large sections of the Xamarin project so anything they do will be lost and any branches will not merge after the migration hence me saying you need a PLAN…
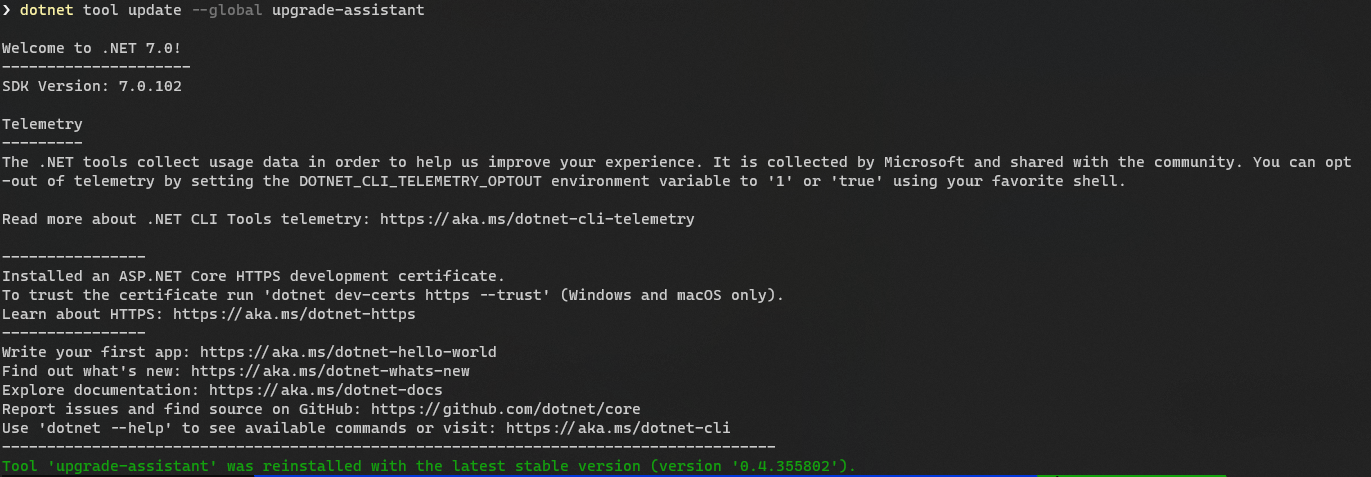
Now install/update the .NET Upgrade Assistant dotnet tool with the following command on your CLi:
dotnet tool update --global upgrade-assistant
Now you have the tool make sure you are in the folder for your project and I suggest you start inside your Xamarin Shared Project as it’s this code we really want to migrate and I will explain more on why later, but I have found that the Upgrade Assistant if run against the Solution will affect the other projects in the solution like say the WebAPI making changes you may not want, so it’s best to stick to just the shared project it’s all we need anyway.
Now you’re inside the shared project folder you can run the following command:
upgrade-assistant analyze MYPROJECT.csproj
This will run over your project and produce a Sarif report showing what Errors and Warning you can expect from running the actual Upgrade, again this will help with your pre-upgrade planning. It took a few minutes for the project I am using here which is my HandyApp application for controlling a 3D printed Prosthetic Arm I built.
If you're interested in Prosthetics, you can read about the project [Here](https://www.cliffordagius.co.uk/post/handybigpicture/) or watch a short promo from Microsoft [Here](https://learn.microsoft.com/en-us/shows/azure-videos/handyapp) this is a project I am still working on so reach out if you want more information.
From this report you can see what major blockers you have and need to resolve before actually committing to a full migration, to view the report there is a Visual Studio extention Here that can help.
When you have checked the report and you’re ready to migrate you can run the following command:
upgrade-assistant upgrade MYPROJECT.csproj --non-interactive --entry-point *
I use the --non-interactive as it saves you a few hundred clicks of the enter key for decisions it’s made but wants your approval for, but by all means leave that part out if you want full control and love bashing the Enter key, I prefer to go grab a coffee.
The assistant starts by making a backup of your project and its files which adds to the safety of creating a new branch. It will then step through the project carrying out the steps of the Manual process for you like upgrading the .csproj to the new SDK style, updating the NuGet’s and namespaces. The process can take a while my small app took 8 minutes to complete on my machine so perfect time to refresh the coffee and biscuits.
But it’s not MAUI or a Single Project
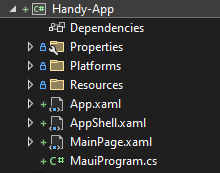
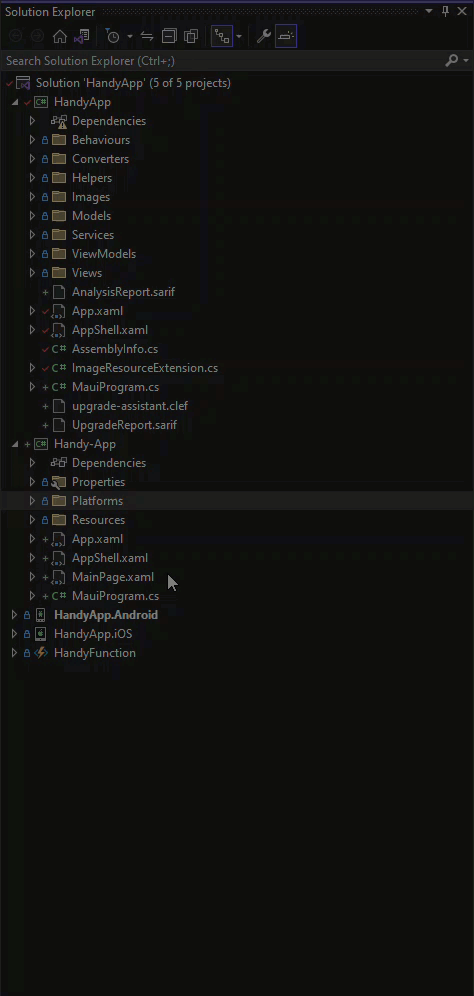
Now the upgrade-assistant has completed its work you will try to open and run the project and get a long list of errors and red squiggles and if you’re like me you’re thinking what the heck that assistant did nothing for me… It’s not even looking like a MAUI app in the Visual Studio solution explorer so is it even MAUI it should look like this:
I thought the same and then went back to look at the manual process before I realised that all it’s doing is fixing up the csproj and the namespaces it’s not converting fully to a MAUI application and I don’t think they highlight this in the doc’s well enough and I guess why your here reading this.
Let’s fix it up
We obviously want our App to take full advantage of everything MAUI has to offer including the cleaner project structures, so the best next step is to migrate to this within our project, don’t panic the work with the upgrade-assistant isn’t wasted. Remember above I said I would come back to why we only upgraded the shared project and not the solution, well it’s here we find out why.
You could be tempted here to fix up all the error’s and attempt to run the project for say Android but this will not work as we only migrated the shared project, if you did migrate the whole solution it’s still not going to work as the Upgrade-Assistant will not make the required changes to the MainActivity.cs hence me suggesting not running at the solution level.
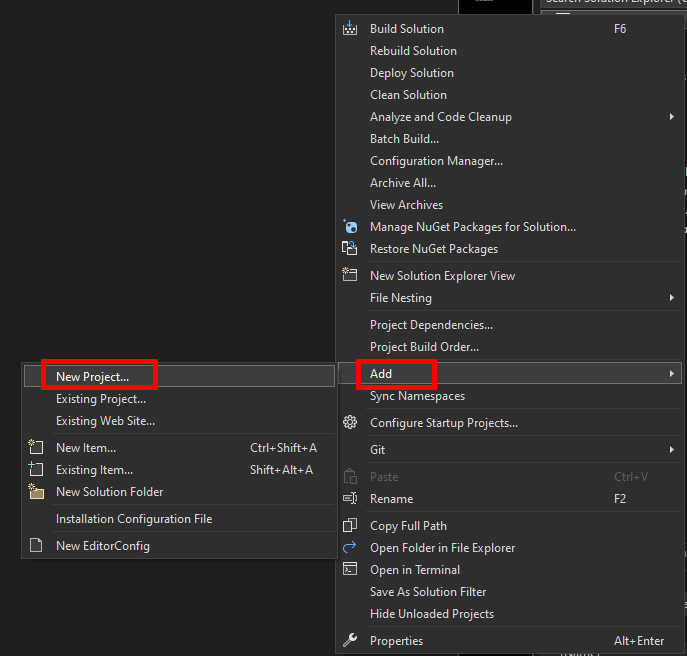
We want to use the new MAUI project structure so to do this let’s add a default MAUI project to our solution, this means right click the Solution in the Solution Explorer and then Add a new Project.
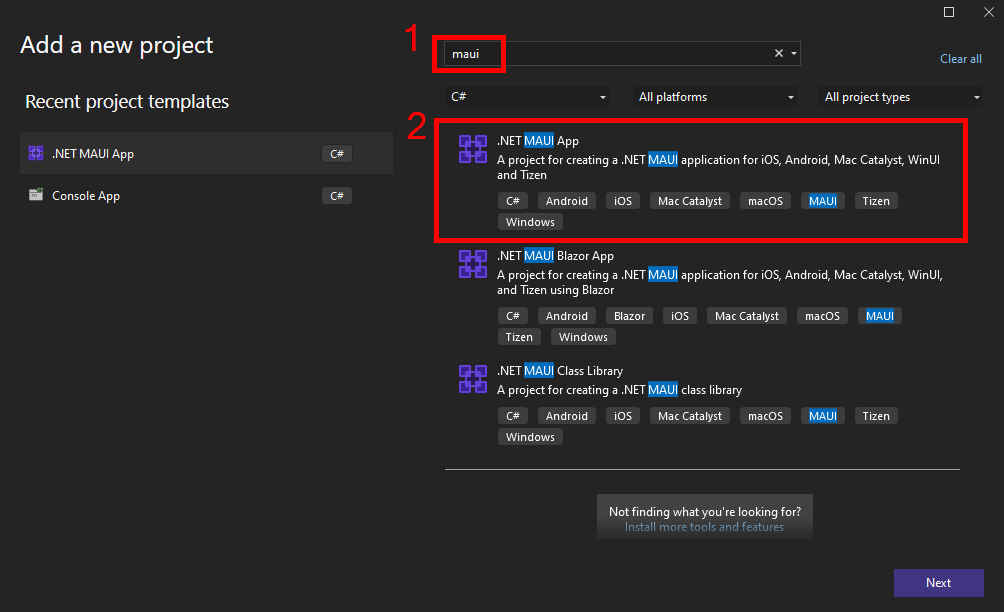
If you type MAUI into the search box you can then filter the long list to the ones you need, select and give it a name as you normally would.
The next step is quite simple from the Xamarin Shared Project drag and drop the folders for your Views, ViewModels, Services, Helpers etc etc into the new MAUI project. As the Assistant has migrated these files and updated the namespaces, they should all be happy in the new location.
Once you have these copied over the next step in my case was to delete the MainPage.Xaml from the root of the project as I keep all my Views in the Views folder and copy the contents of the AppShell.xaml from the Old Xamarin project into the MAUI file.
Now the fun part and that is to do a Build and I warn you now there will be a long list of errors to fix, and this is where most of the work is. You will have the easy missing NuGet’s as we havn’t added those to the MAUI project yet, but others will be breaking changes between Xamarin and MAUI for example, MAUI has no Relative Layout if your app uses that it’s a big change or Color is now Colours so lots of search and replace needed.
This is where all that planning upfront comes into action and for a small app like my HandyApp it’s a solid days work, however on some client App’s this step can take a few days to resolve especially if there is no MAUI UI Control for what was being done before and your forces to create from new.
I am going to leave this step here, not because I don’t want to help but as I said above every app is different and your issues/errors/blockers will be unique to your project. If you’re stuck and really need some help, then please reach out we would be more than happy to help you on your journey
Android / iOS changes
Now the main shared project items are copied over you need to look in the Xamarin Android and iOS app projects for any bespoke code like say a CustomerRender or other custom Platform-Specific code.
If you have any you need to copy this over into the relevant platform in the new MAUI project. During this step you may find that some common practices in Xamarin are now resolved and part of the defaults in MAUI so check the Doc’s before you go too far.
Be sure here that if you have any interface code from your platform specific changes you include a version in the WinUI and MacOS platforms otherwise you will get lots of build errors later.
You should now be able to build and run your App for the first time, I tend to start with the Mobile versions so Android and iOS first as that was what Xamarin provided to check I am back where I started. Once I have these both working, I try Windows which should all being well just work.
Fonts and Icons
Once you have the errors fixed you should have the app running all the Fonts and images will be missing. You can now copy these from the Android or iOS resources folders into the MAUI resources folder.
The trick here is to pick the best image and if you still have access to the design files for these images and icons see if you can get hold of SVG files in place of PNG’s this will mean the final results will be much better quality across the platforms.
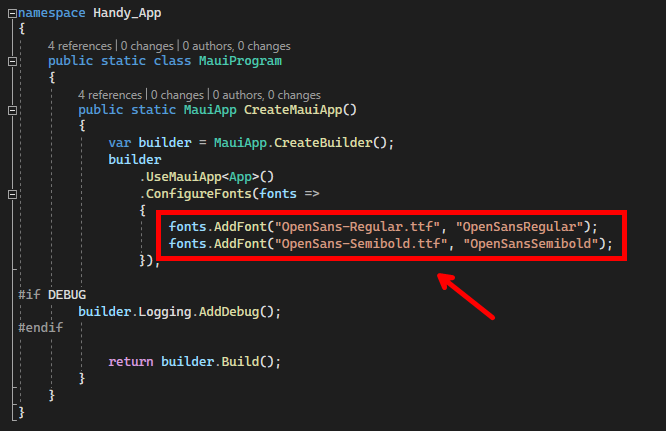
For the Font’s this is the same, but you may have the Fonts listed in the Old Xamarin projects in the AssemblyInfo.cs as an embedded resource. Copy the Font files in the new MAUI project resources folder and in the MauiProgram.cs you will see a ConfigureFonts section to add/update your fonts.
Final parts
Now you can clean up the code and switch out things like MVVMHelpers for CommunityToolkit and Source Generators, if you don’t know what these are check them out Here and lookout for a follow on blog post 😉
Now that you have all the code and app runs you can delete the old Xamarin projects from the solution. Yep, you read that right just delete the projects, the Shared project and the Android and iOS heads as you do not need them anymore. Hopefully, nobody made any commits to these while you were Migrating, and you can commit the changes to repo and start the testing to be sure it’s all still fully functioning.
Conclusion
There is a lot to the migration, and you will see and hear different arguments about the best way to achieve it, but I have found this to be the simplest and easiest way so far.
As long as you make a robust plan and carry out the research into your current App and what 3rd party library’s etc you need which hopefully means making that SBOM I mentioned the entire process should be fairly pain free. It is scary with the 100’s of error messages when you first try and run the App but use the power of your IDE to find and repair them.
Lastly reach out and let us know how you got on or to share your hints and tips, and if you hit a real stumbling block maybe we can help or reach out to the MAUI team on socials they are willing to assist as well.
I hope it’s a good migration for you.
Happy coding.